# Limit
The **Limit** feature is available under **Flow Transformation**.
You can place it immediately after any connector step, such as **Zendesk**, **Salesforce**, **HubSpot**, or others, to control how many items from a returned list should move to the next step.
{% hint style="info" %}
This is especially useful when you only want to process a subset of records instead of the full list.
{% endhint %}
### **Use Case Example**
Suppose you are building a flow where you fetch a Zendesk ticket and want to notify only a limited number of collaborators about an update. Zendesk’s **Get Ticket** action returns a list of `collaborator_ids`, but you may only want to process the first 5 collaborators.
This is where **Limit** helps.\
You can narrow the list, e.g., to the first 5 collaborator IDs, before sending them to further steps such as **email**, **Slack**, or additional logic.
### **How does the Limit feature work?**
* After your connector step (for example, **Zendesk → Get Ticket**), add the **Limit** step from the **Transformation Actions** section.
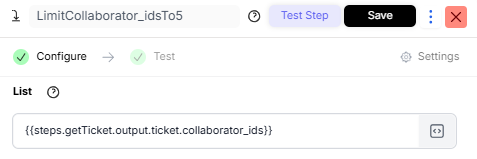
* In the **List** field, provide the list you want to limit.\
For example, if you're retrieving ticket details from Zendesk, you can use:\
`{{steps.getTicket.output.ticket.collaborator_ids}}`
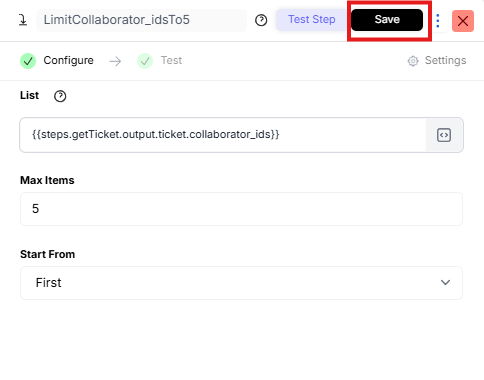
* In **Max Items**, enter the maximum number of items you want to allow through.\
**Example:** `5`
* Choose the **starting direction** for the limit:
* **From First Item**
* **From Last Item**
This defines whether the limit applies from the beginning or end of the list.
* Click **Save** in the top-right corner to apply the configuration.
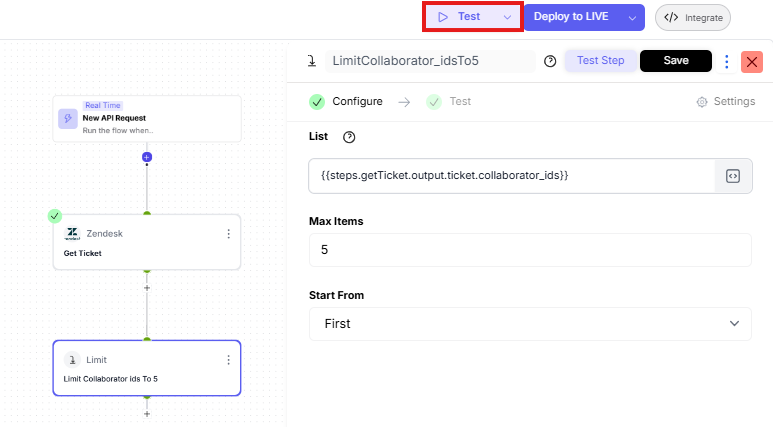
* To test the step, use the **Dashboard** button in the top-right corner.