Import Data From a Custom Source, Transform it and Export it to PowerBI
Learn how to create custom connectors and export data.
Introduction
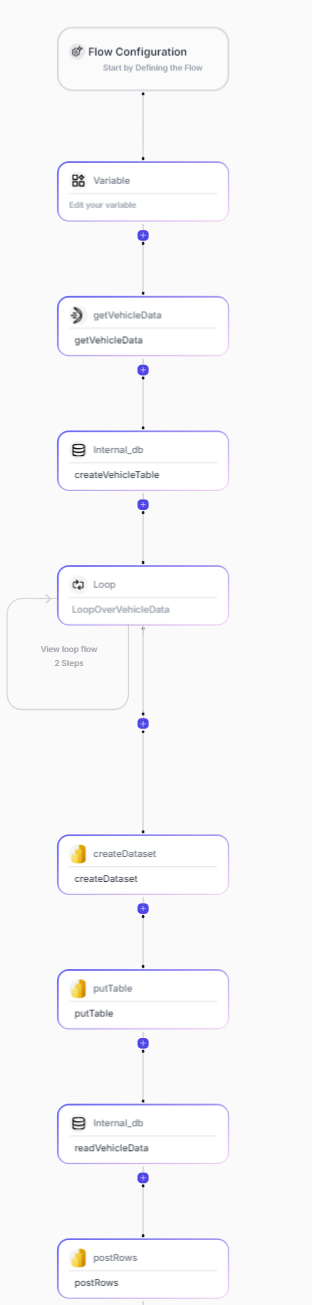
We are going to build an API Flow that will fetch data from a custom data source, transform it, store it in the fastn internal database and finally export it to PowerBI.
Prerequisites
This API flow is going to connect to PowerBI for that a set of credentials are required to login to PowerBI and authorize its corresponding connector as we will see in the steps below.
Part I - Fetching data from a custom data source
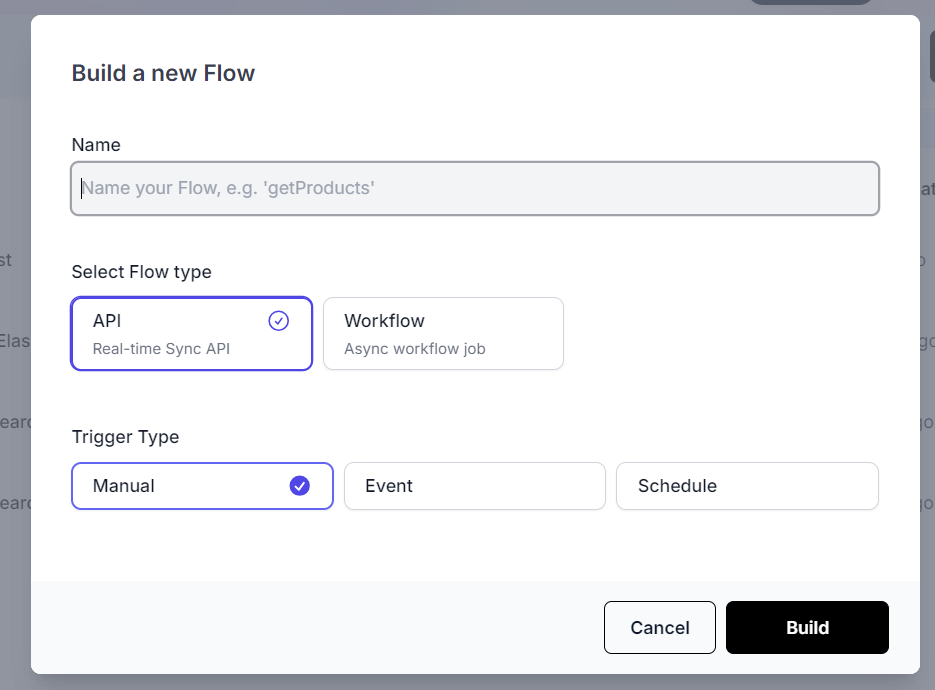
Create a new flow
- To start off, go to the
Flowspage from the left side menu and add a new flow.
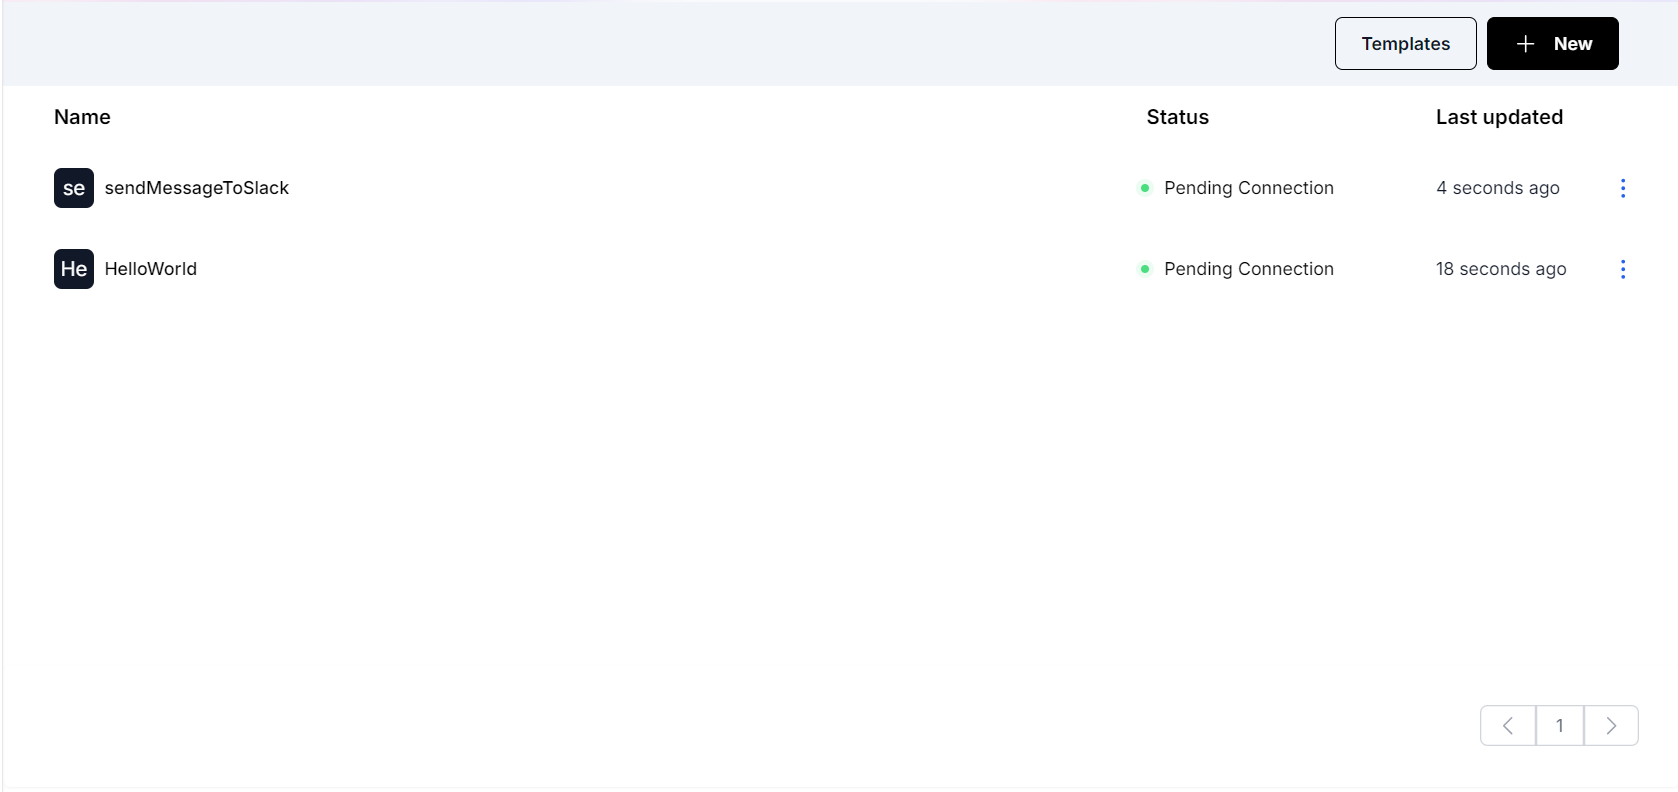
- Give your flow a name and create it as an API.
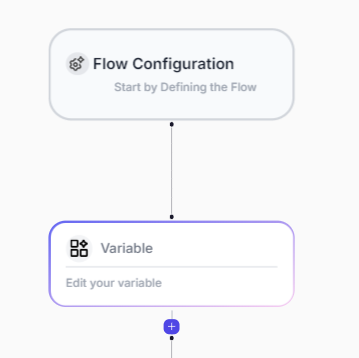
Add a Variables element
- As a first step in our new flow, we will add a
Variableselement. This will allow us to set and use variables throughout the flow.

- Drag and drop a
Variableselement from the right side menu into the flow. We will come back to add variables here as we develop the flow.
Add a Custom Connector
- Next we are going to drag and drop a
Connectorelement from the right side menu.
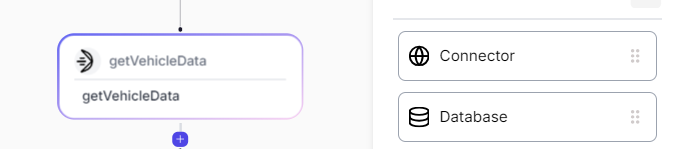
- We are going to choose
My Connectors.
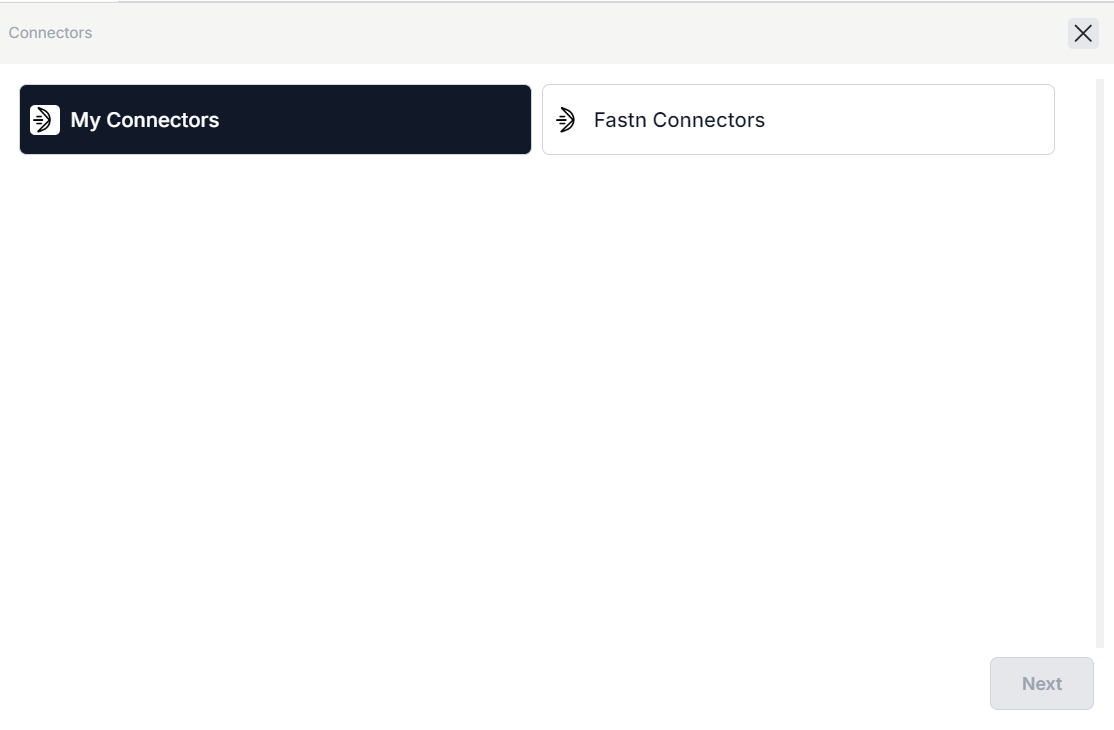
-
Use the + button at the top of the page to create a new connector.
-
Add an
HTTP APIconnector. -
Now we can setup our custom connector. Here users can setup various type of REST APIs. For the purposes of this example we will use a public API provided by NHSTA (National Highway Traffic Safety Administration) to fetch data related to vehicle models based on make and model year.
-
The example endpoint we will use is
https://vpic.nhtsa.dot.gov/api/vehicles/getmodelsformakeyear/make/honda/modelyear/2018?format=json
-
This particular endpoint requires the make and model year to be passed as part of the url
-
To set this up in our connector we are to going to input the following URL
https://vpic.nhtsa.dot.gov/api/vehicles/getmodelsformakeyear/make/{{url.make}}/modelyear/{{url.modelyear}}
-
We will set the method to
GET -
And let's name the connector as
getVehicleData
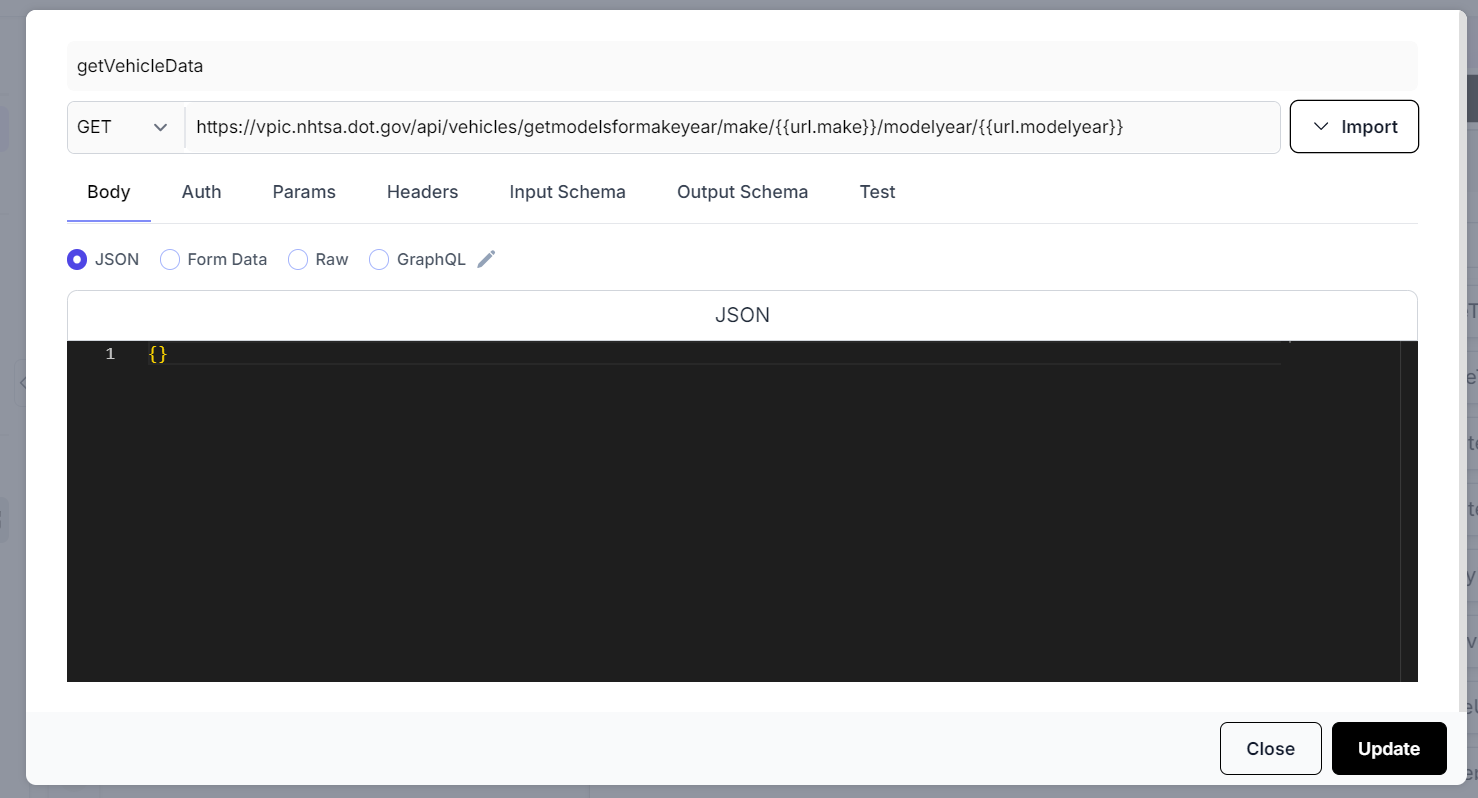
-
Under the URL input box. We see a number of tabs corresponding to different configuration options available. We will skip the
Bodyand theAuthtab since our API does not need a body and has no authorization. -
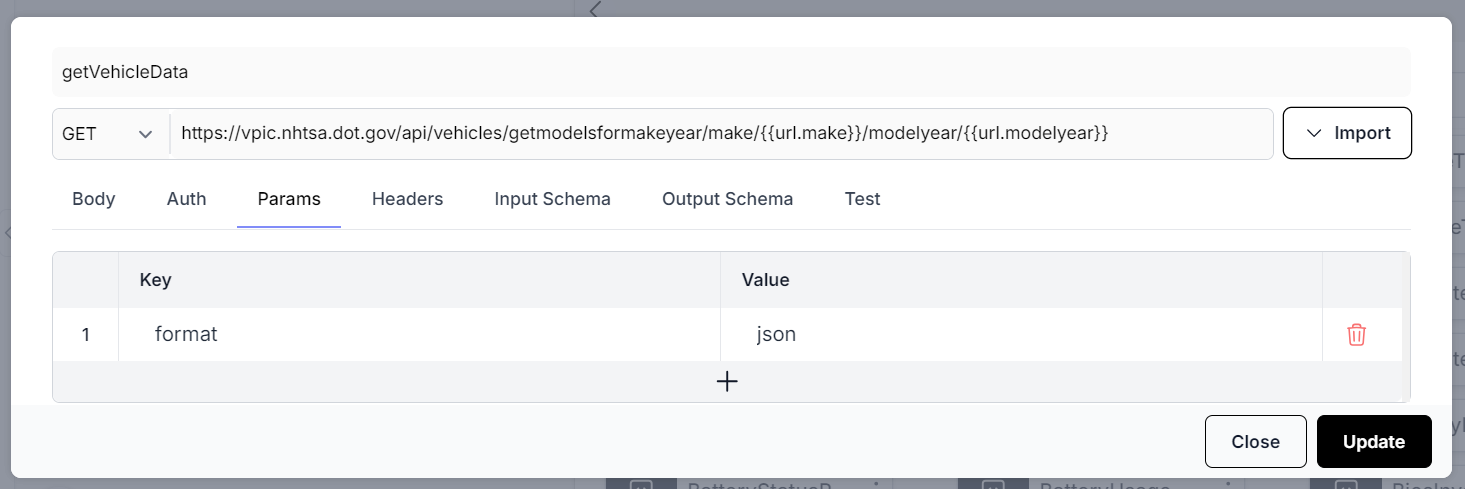
Under the Params tab, we will add the
format=jsonparam as shown in the image below.
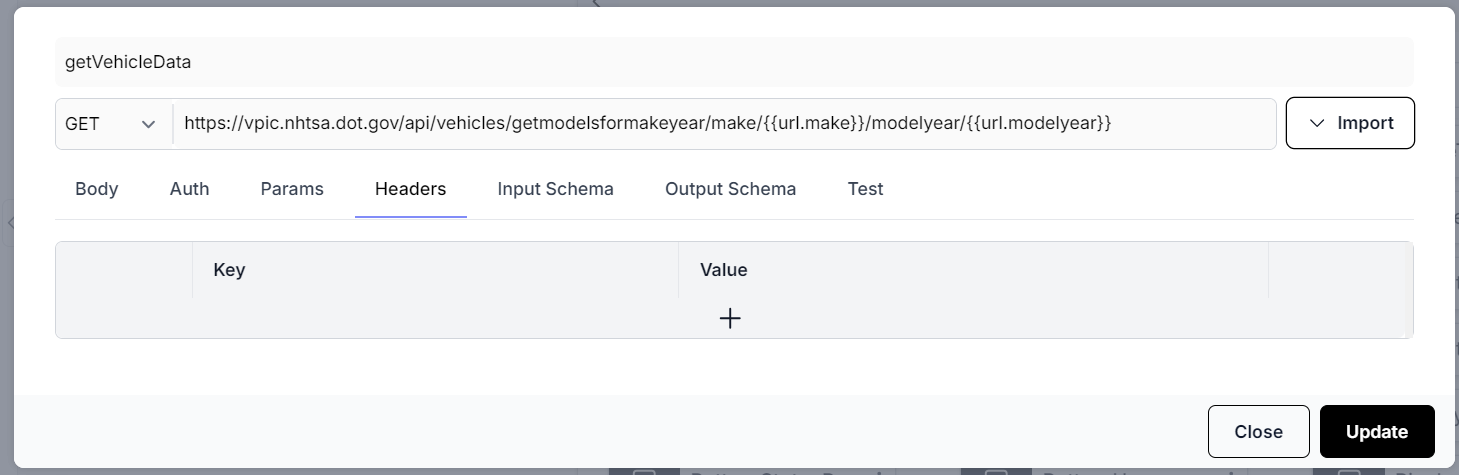
- Under the
Headerstab, we will remove any pre-configured headers as we don't require any for this API.
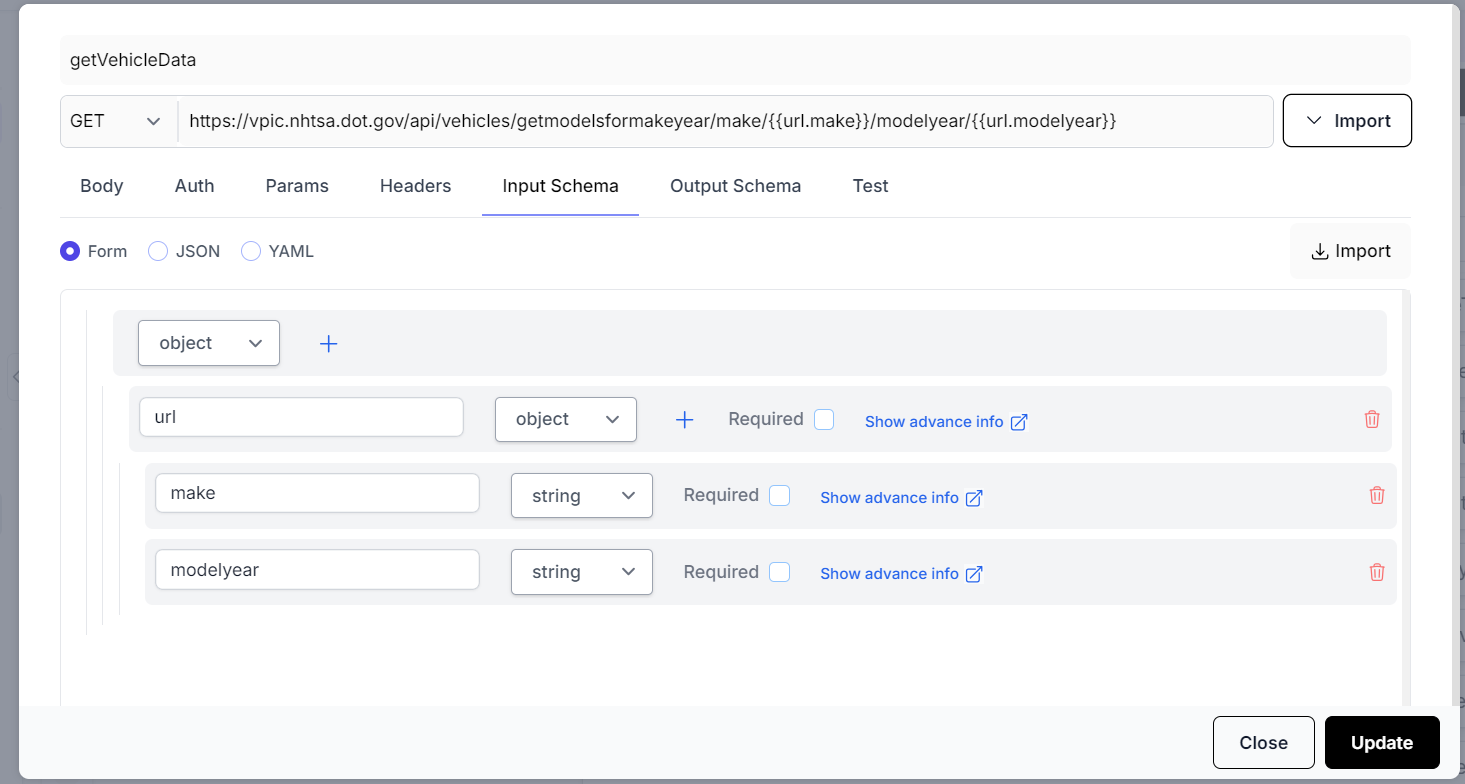
- Next, we will go to the
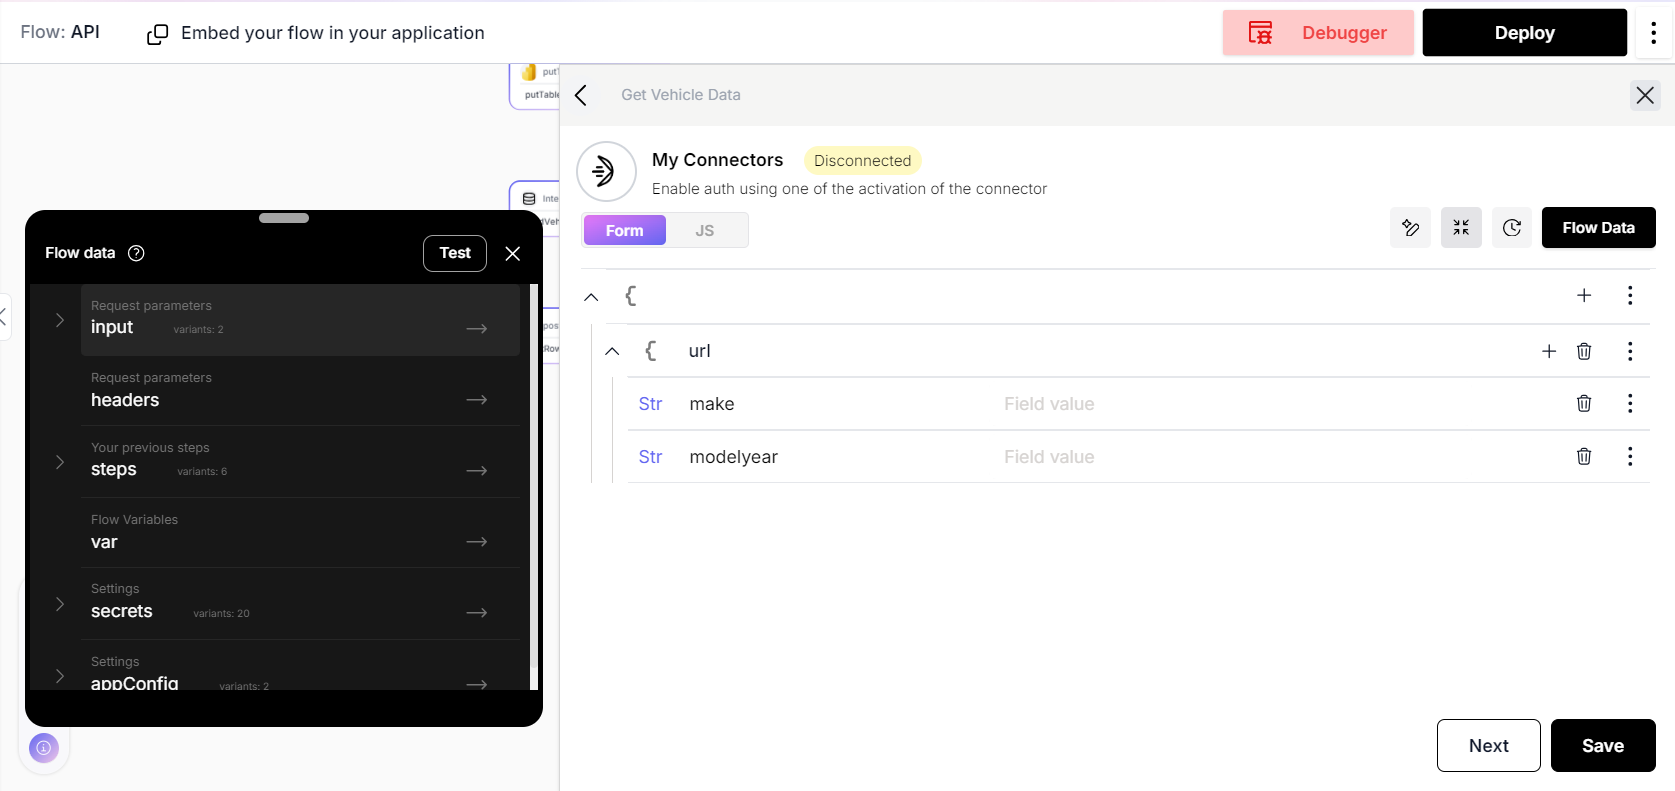
Input Schematab. This will automatically pick up the inputs we are passing in the URL. Alternatively it can be also be configured using the form as in the image below.
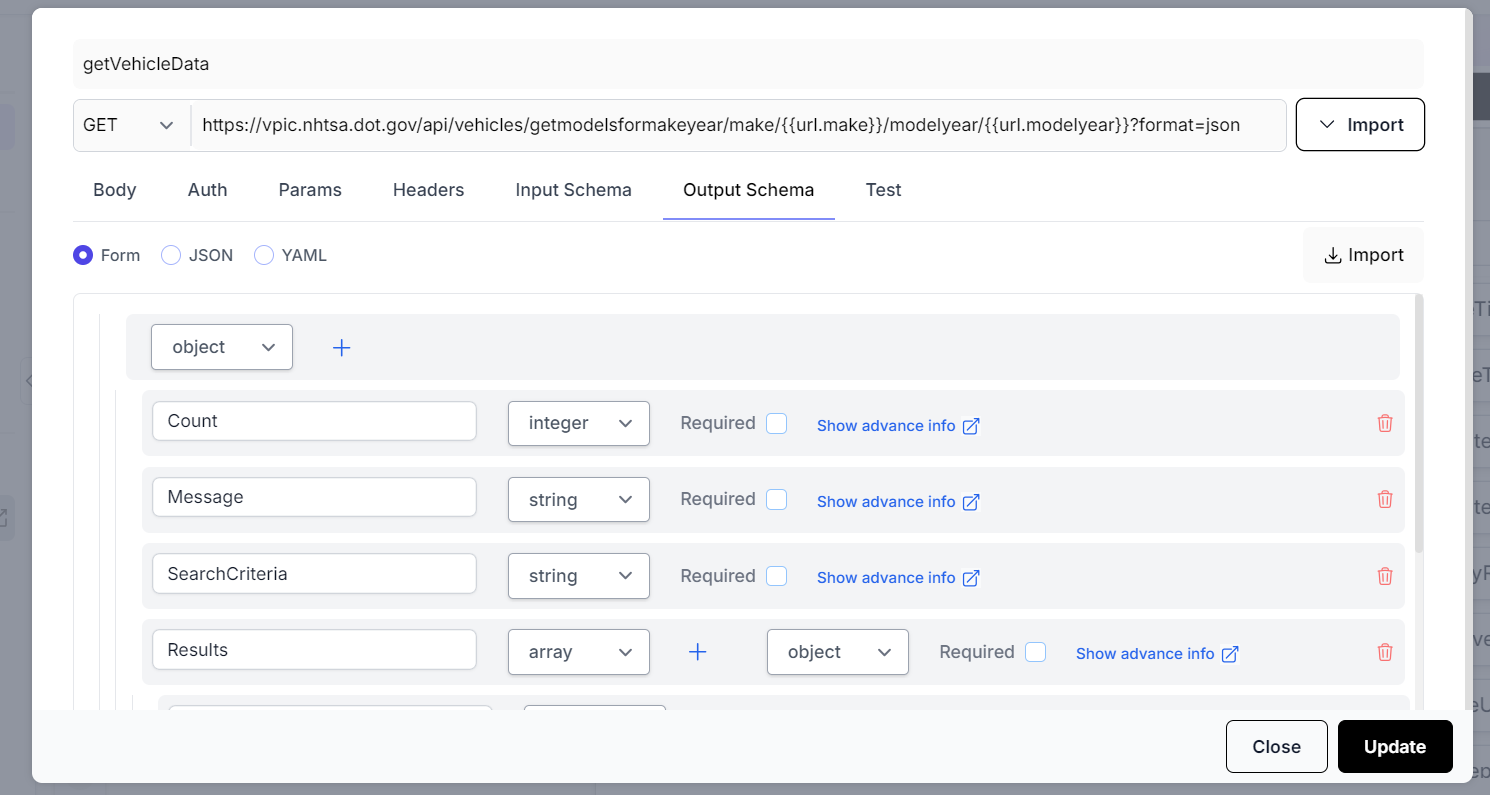
- Select the
Output Schematab. To make the process easier we will use the import feature. Click on theImportbutton under theOutput Schematab. In this dialog box we will paste the example output of the API and clickImport.
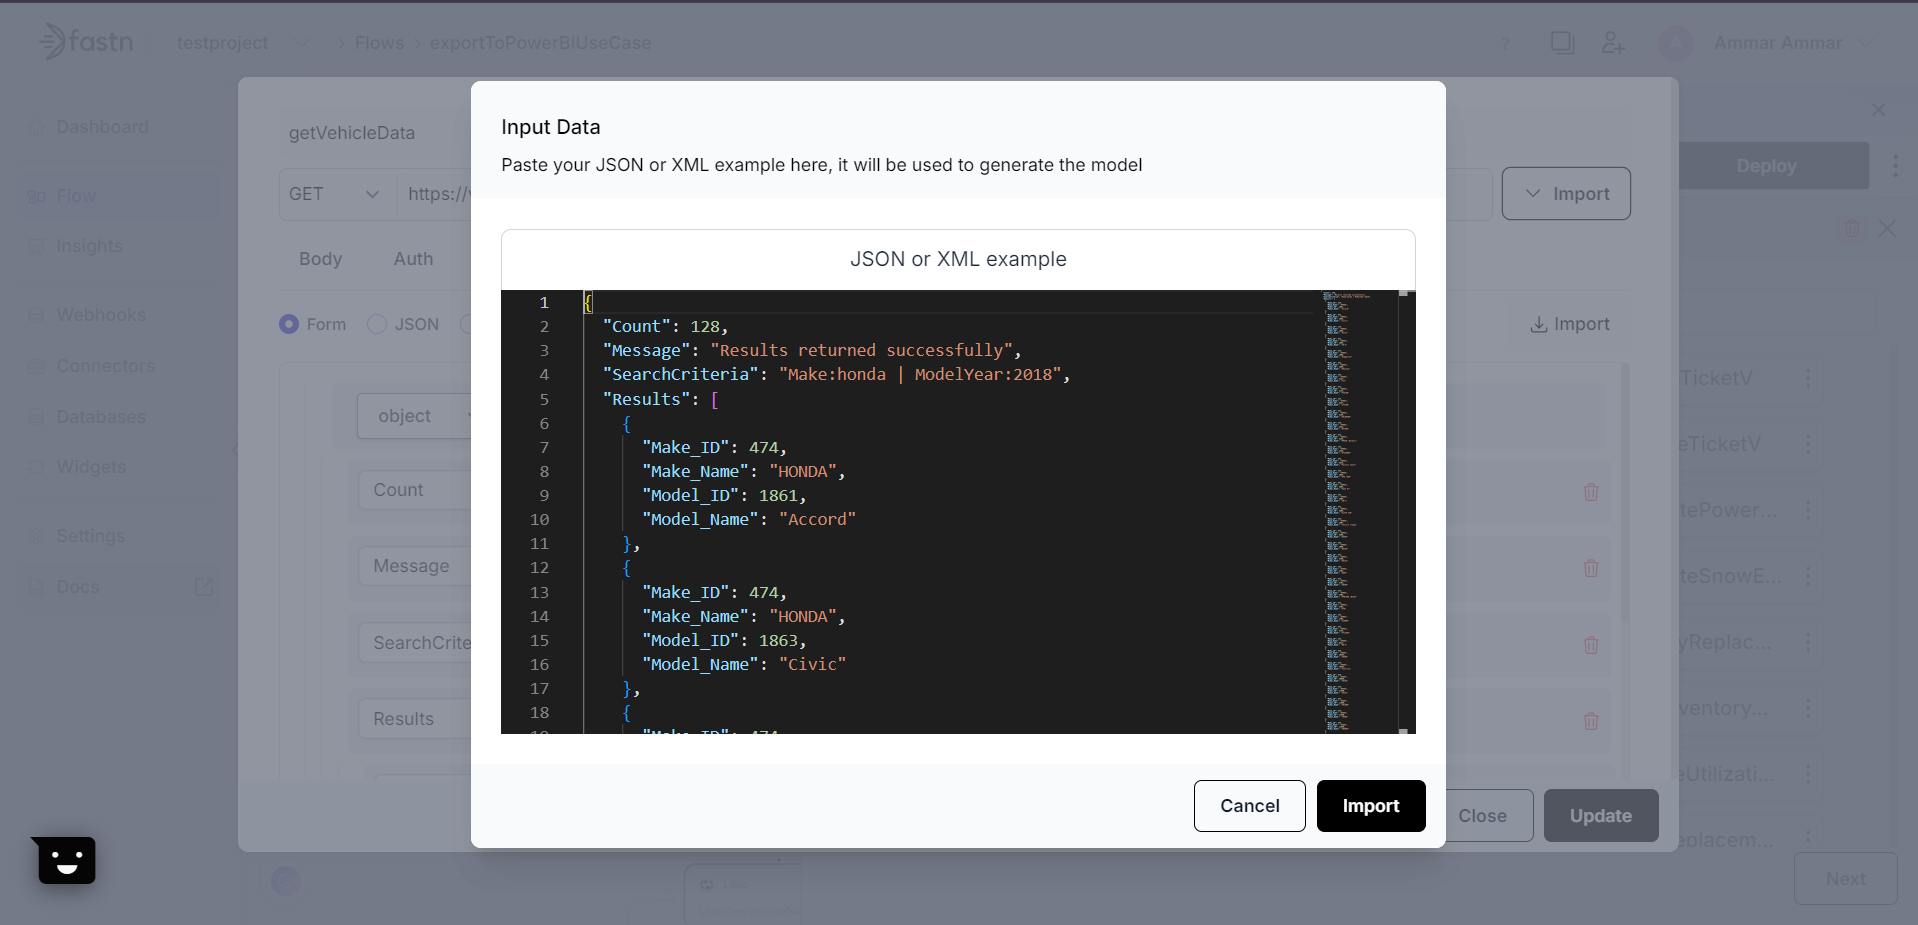
- The output schema will be auto-generated.
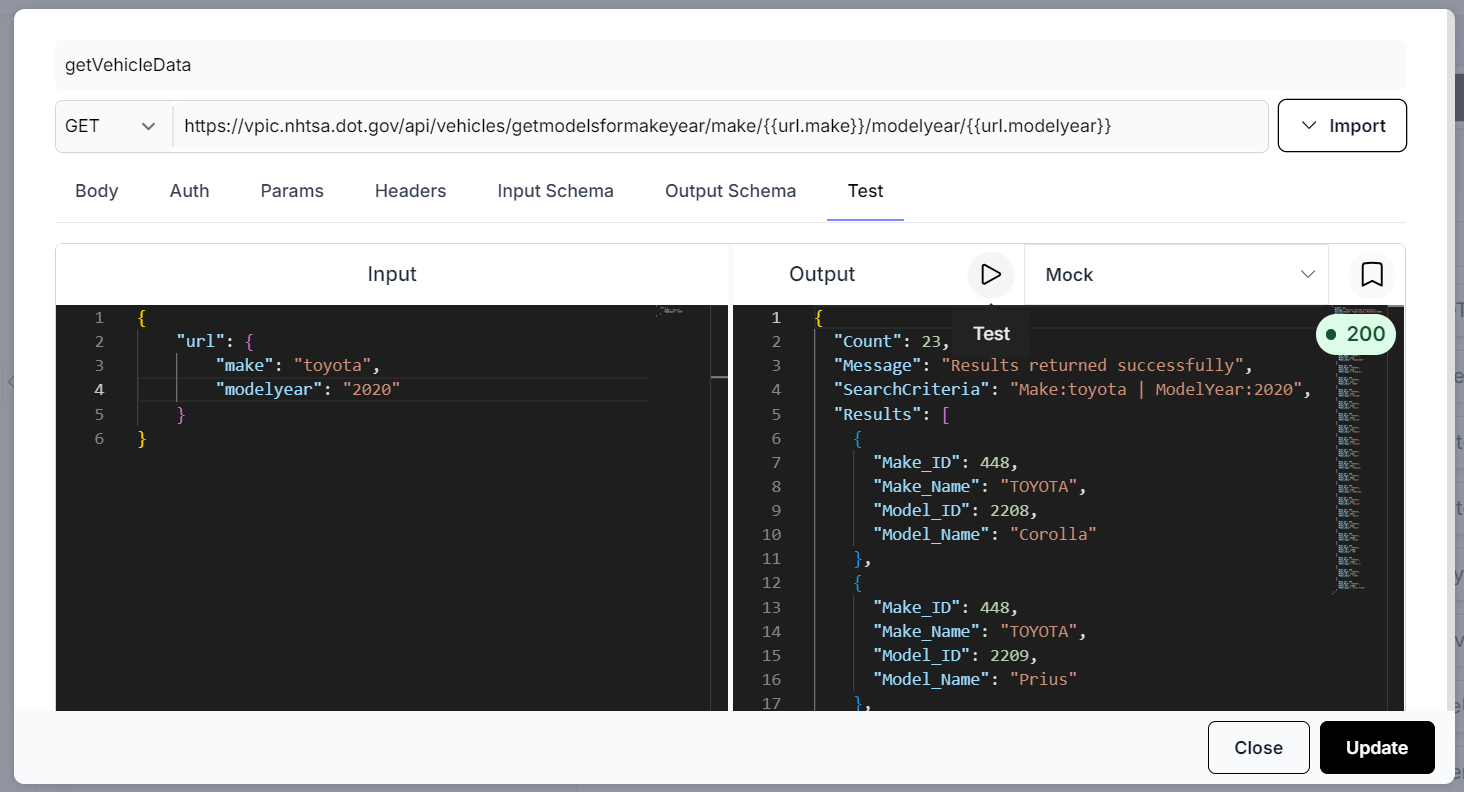
- We can use the
Testtab to add our desired inputs and test the API. This makes sure that our connector is configured and functioning correctly.
-
Click on
Updateto finish creating our custom connector. Select theGet Vehicle Dataconnector and click onNext. -
On this page, we will see that we need to assign the inputs required to make the connector work; namely the
makeandmodelyearvalues.
- To map these values correctly we should send them as the input of the flow when we trigger it.
Setting up an input model
-
In order to pass and read the values through the input of the flow. We need to setup an input model.
-
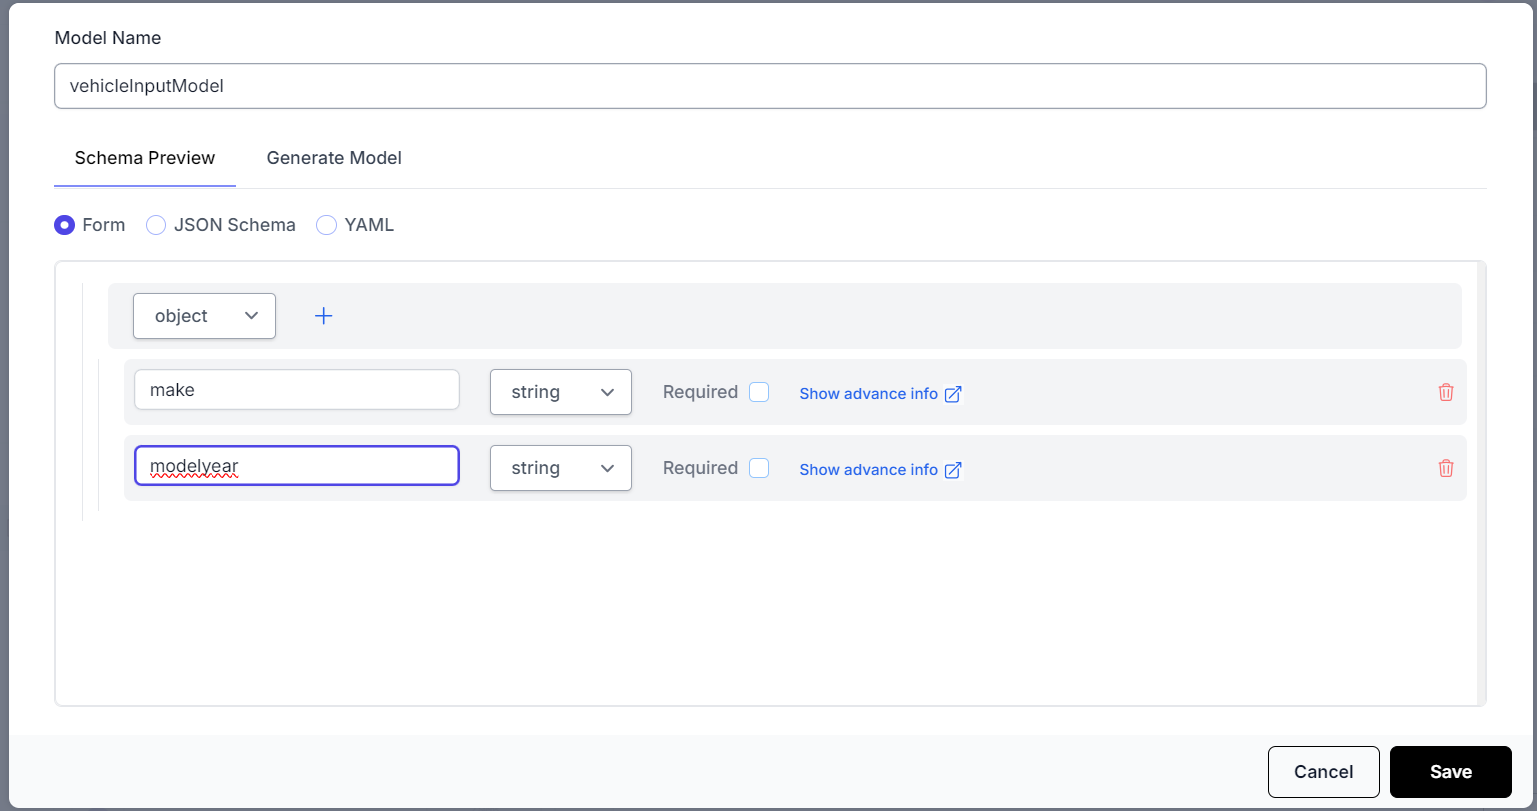
To do that we go to the
Flow Configurationelement at the top of the flow. And click theAdd Modelbutton on the top right. The model can be setup and saved as shown below.
- Next, we can go the
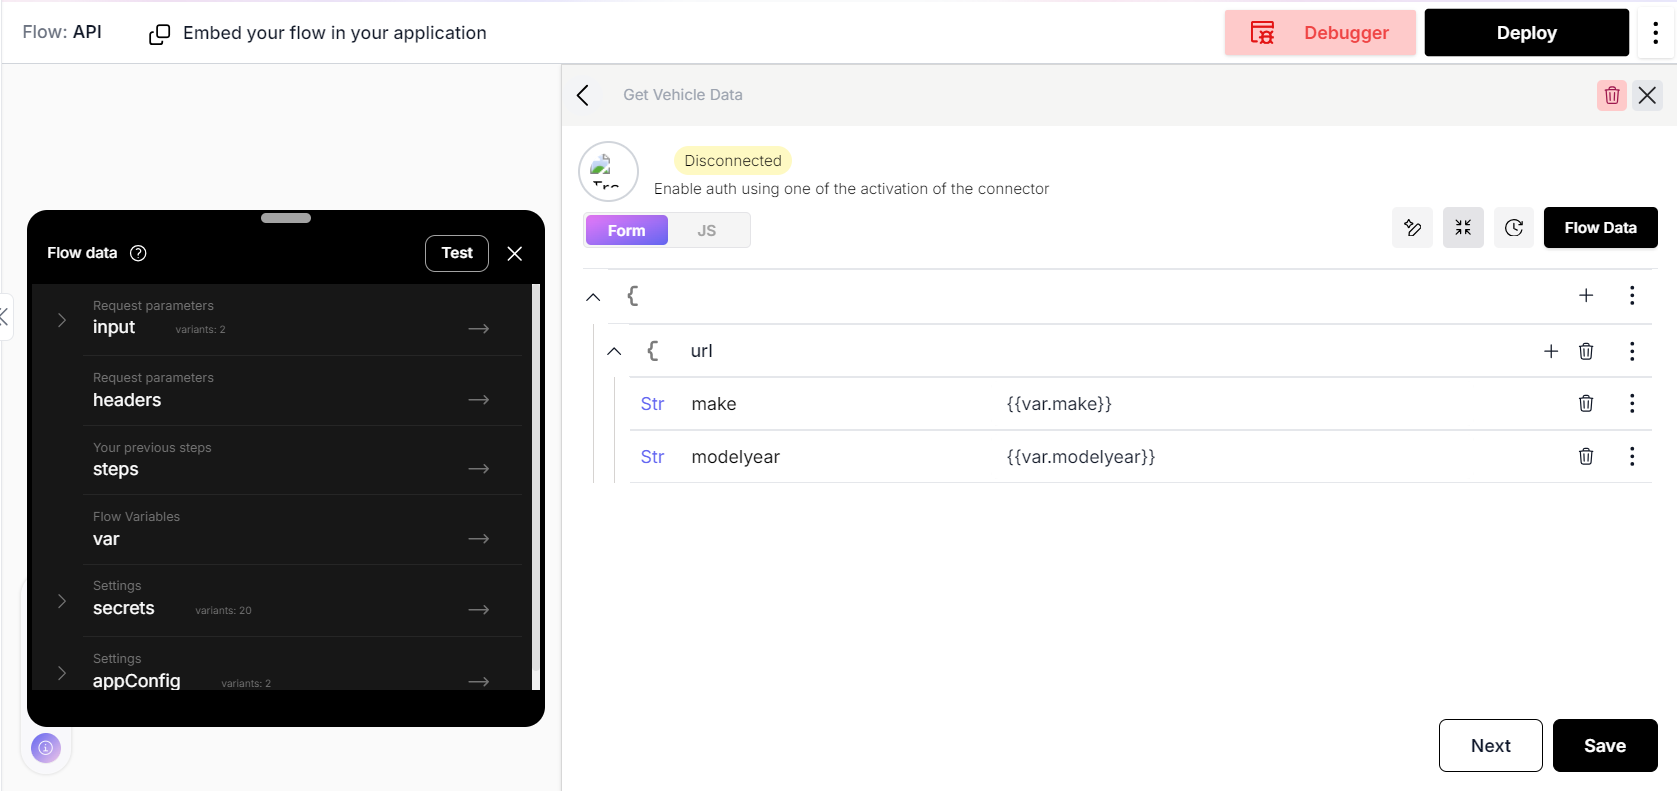
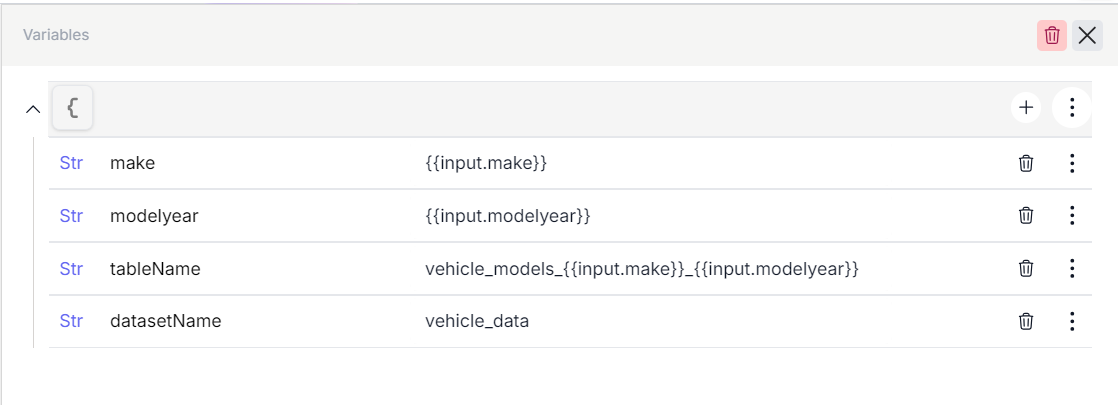
Variableselement we created before and add two variables calledmakeandmodelyearthat will hold the values we get from the flow input. As seen in the image below the autocomplete feature will help in detecting the input model we defined. So we setmaketoinput.makeandmodelyeartoinput.modelyear.

- After this we go back to the connector and add the
makeandmodelyearvalues from the variables as shown below.
Using the debugger
-
At this stage we can test are flow to make sure that the input is correctly passed to the connector and we are able to get data.
-
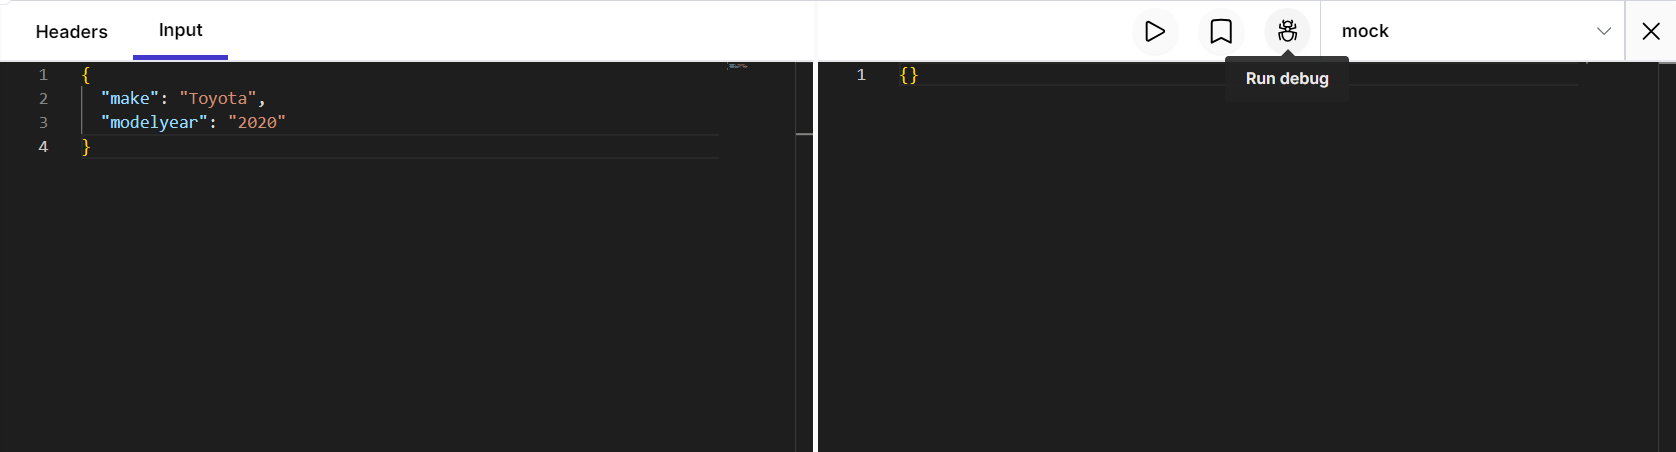
To open the debugger, click on the
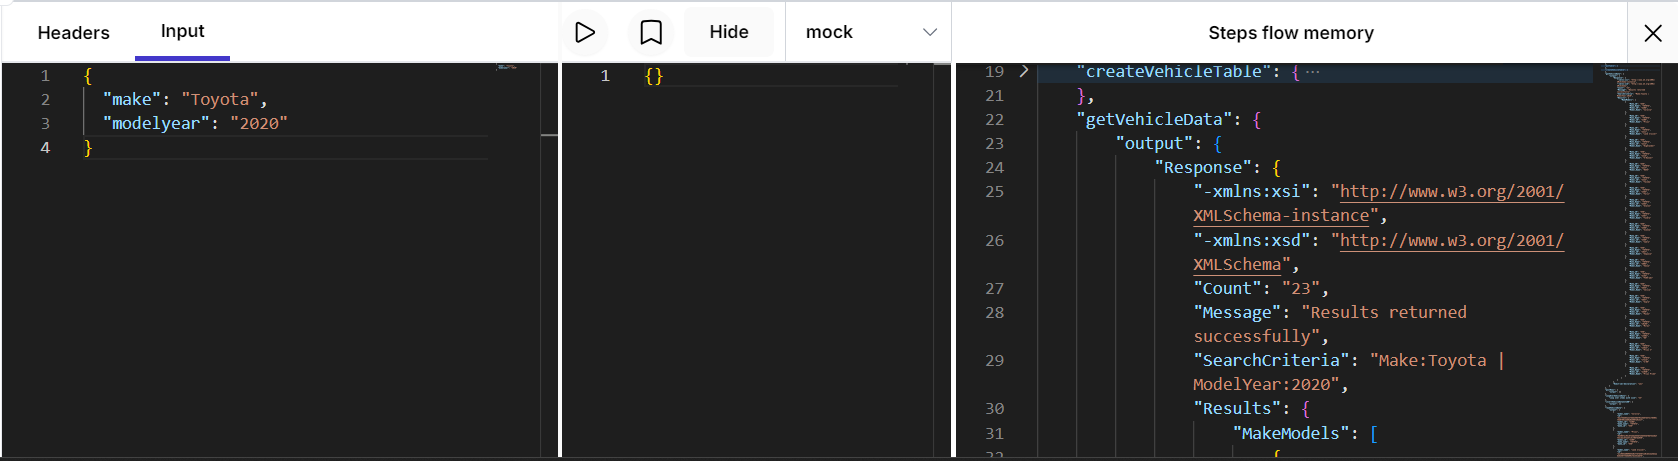
Debuggerbutton on the top right of the canvas. The input should be already setup. The input values can be updated according to the test and theRun Testbutton can be clicked on to execute the current flow. In this case, the vehicle data returned in the output box will tell us that the flow is working correctly. Alternatively, any errors will also appear in the output box.
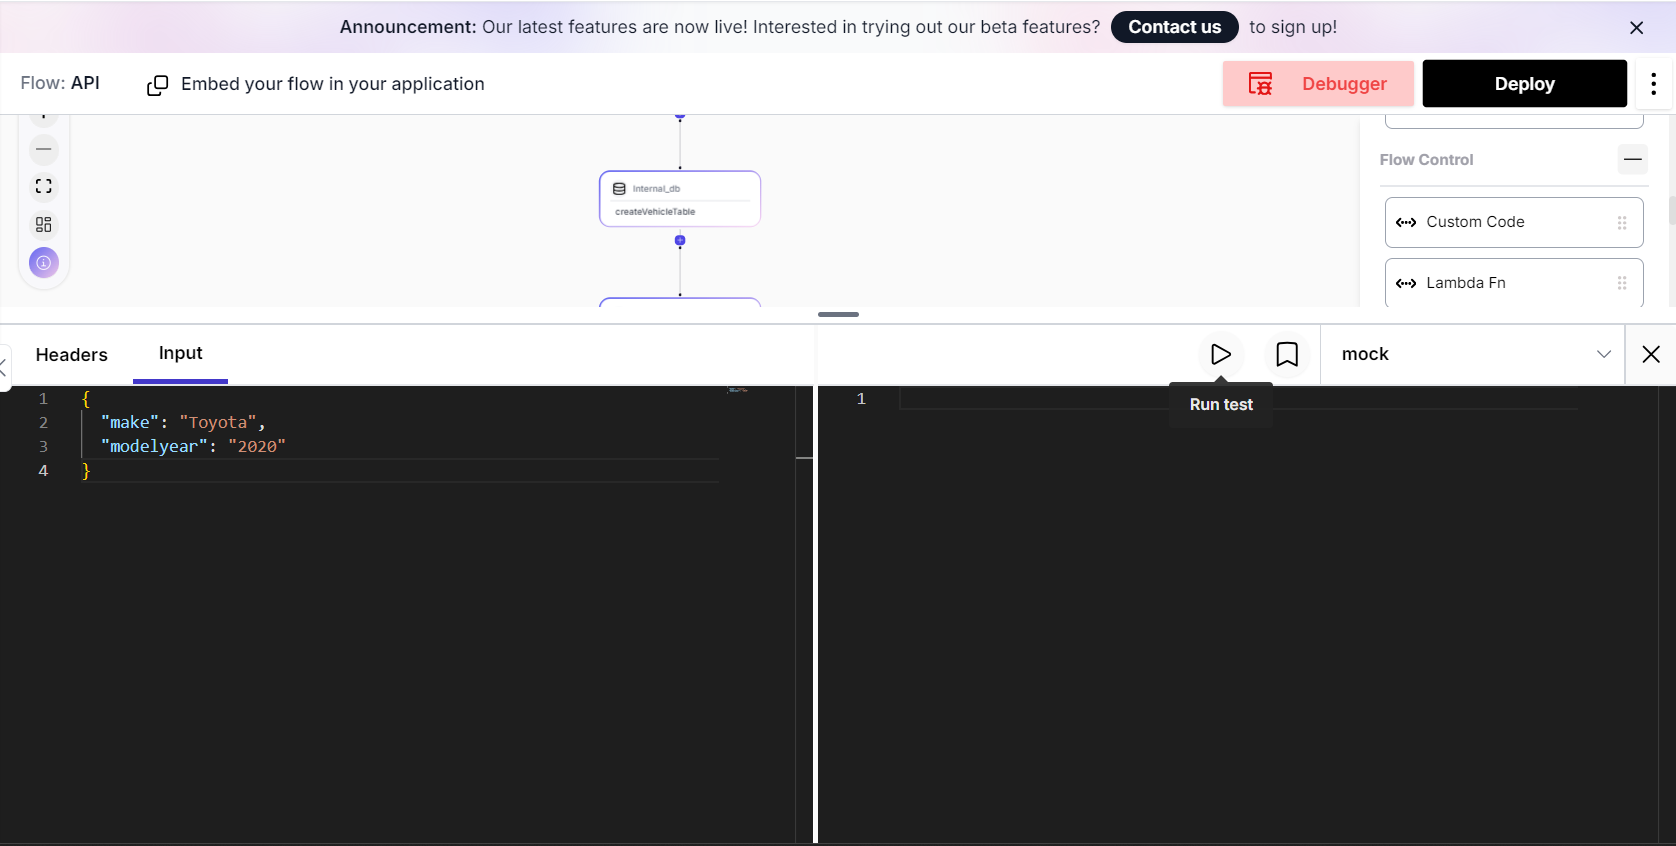
-
Seeing the vehicle data in the output box means that we have correctly setup the connector in our flow and we can move to the next part.
-
Like we used the debugger here. It can be used at any stage after adding more steps in your flow to make sure that it is working as expected.
-
The debugger also allows us to see the output of each step in the flow and analyze them for any errors or inconsistencies.
Part II - Transforming Data and Storing it in the fastn Internal Database
Setting up an internal database table
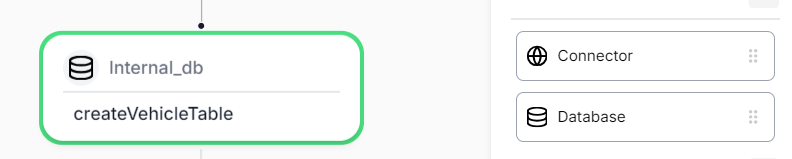
- As the next step, we drag and drop a
Databaseelement that will allow us to interact with fastn's internal database.
-
We are going to name this step as
createVehicleTableand set it up to create a table with columns to store the data returned from our connector along with an additional id field. -
Here we need to write an SQL query to interact with the table. The query given below drops a table if it already exists and creates a new table with suitable columns.
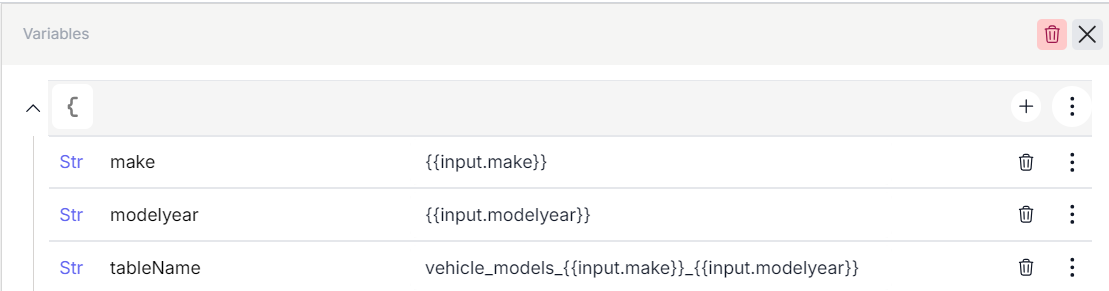
DROP TABLE IF EXISTS "{{var.tableName}}";
CREATE TABLE "{{var.tableName}}" (
    id varchar(255) primary key,
    model_id varchar(255) not null,
    model_name varchar(255) not null,
    make_id varchar(255) not null,
    make_name varchar(255) not null
);
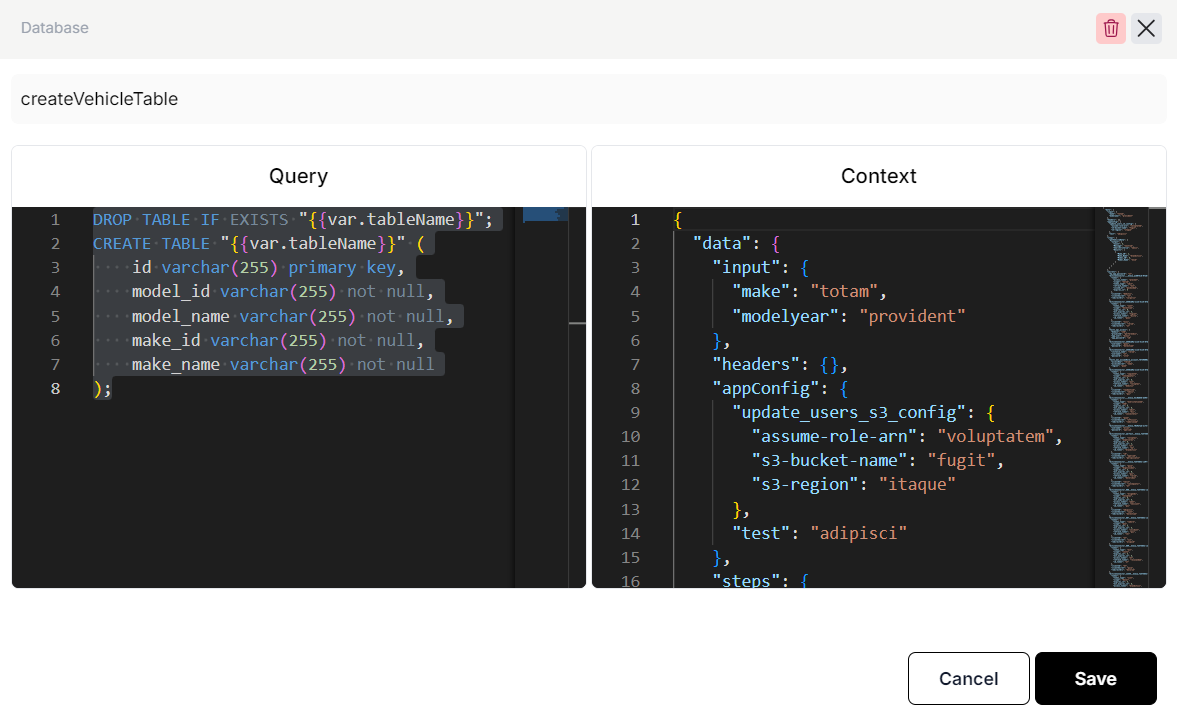
- Notice how the SQL query has a reference to the
tableNamevariable. The reason is that it is a good practice to define it as a variable is that we will use it in multiple places. So we go back to theVariableselement and add a tableName variable as shown below.
Transforming data
-
Now we need to transform the data and store it in our created table. This will need to be done for each vehicle object returned in the connector's response data.
-
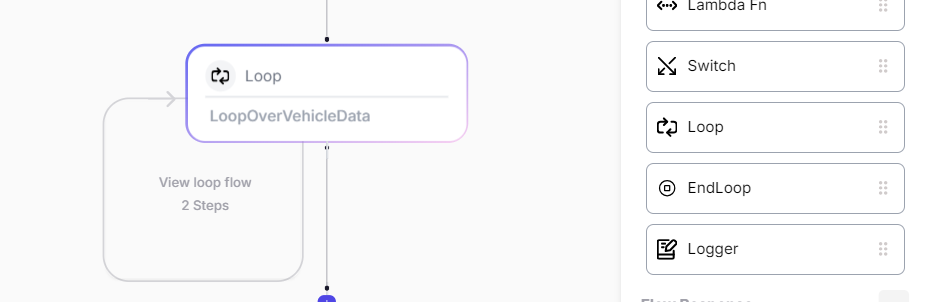
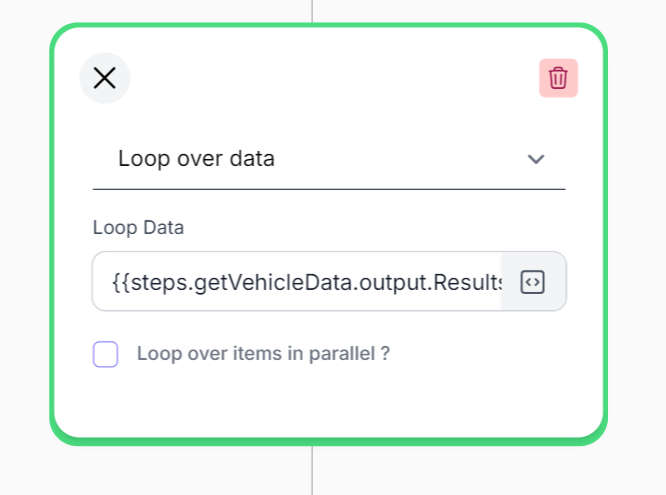
To do that we add a Loop element and set it up as Loop over Data.
-
In the loop data we pass the output data from the connector using the following expression.
{{steps.getVehicleData.output.Results}}
- This will loop over the results and process one vehicle object at a time inside the loop. The example below shows what each object will look like.
{
      "Make_ID": 474,
      "Make_Name": "HONDA",
      "Model_ID": 1861,
      "Model_Name": "Accord"
}
- Inside the loop whenever we want to reference the item in the loop we will use the following format.
{{steps.LoopOverVehicleData.loopOverItem}}
- Inside the loop we will first add a
Data Mapperstep. We can use the data mapper to transform our data. For the purpose of this example we are going to create a hash and assign it to the id variable.
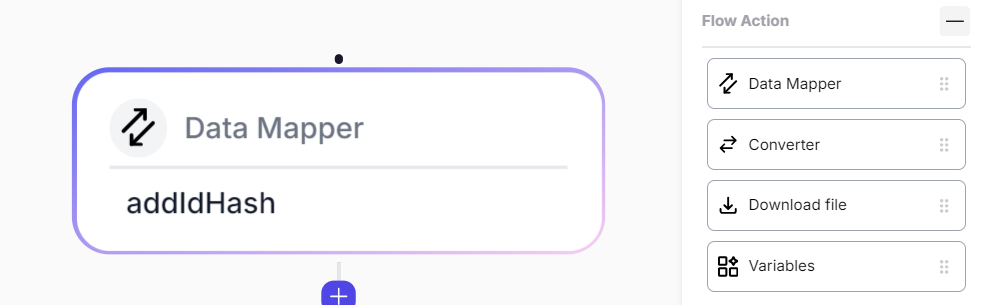
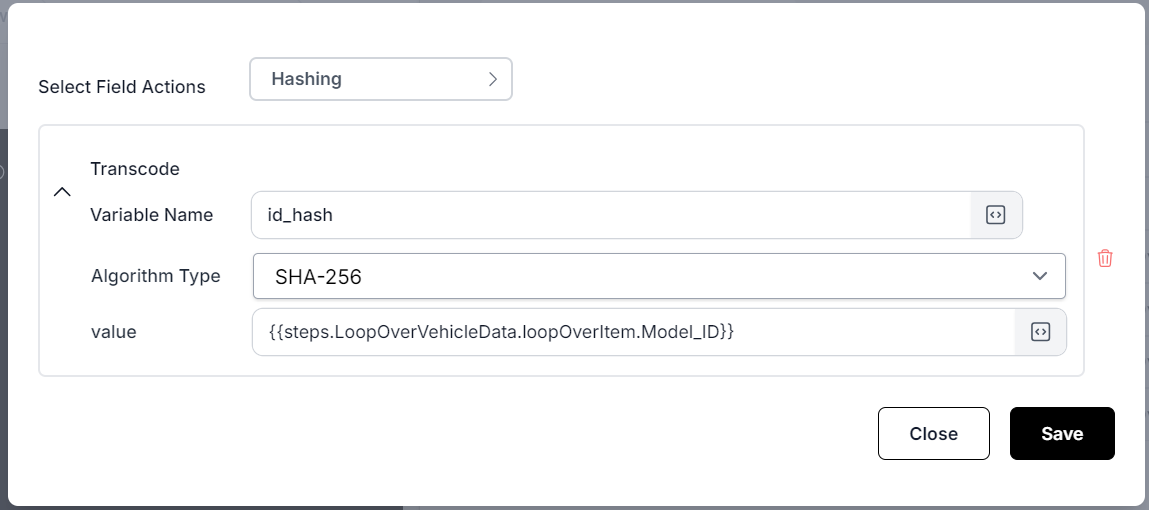
- To setup a hash action we create an id field and use the three dots at the end of the row to select advanced actions as shown below.
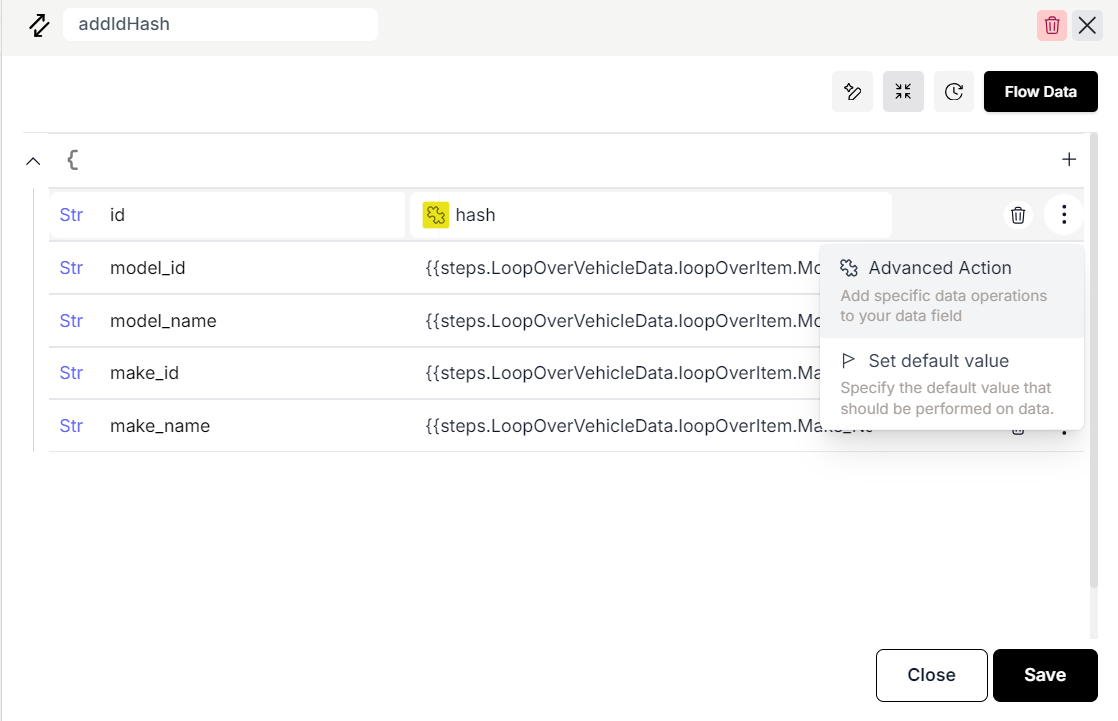
- We then select the
Hashaction for the field and give it the value to hash as{{steps.LoopOverVehicleData.loopOverItem.Model_ID}}This will use the Model_ID value to create a hash and store it in theidfield.
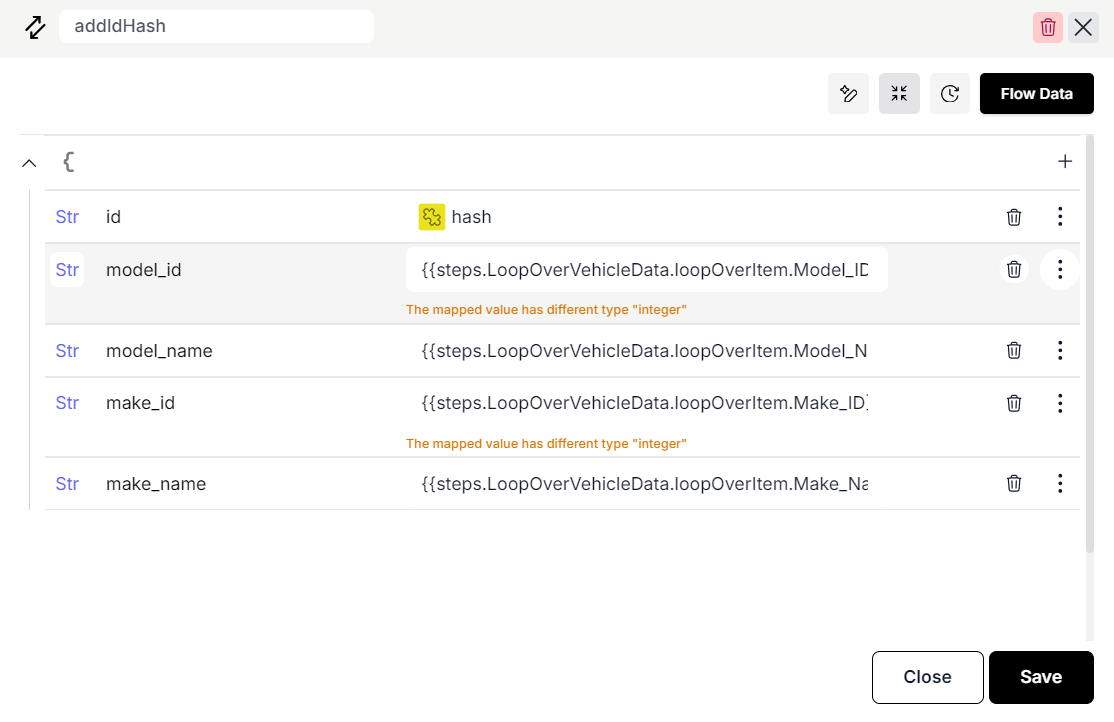
- We also need to assign values to the rest of the fields. For now we will pass the values directly but we can always use a combination of advanced action and variable assignments to transform our data as needed.
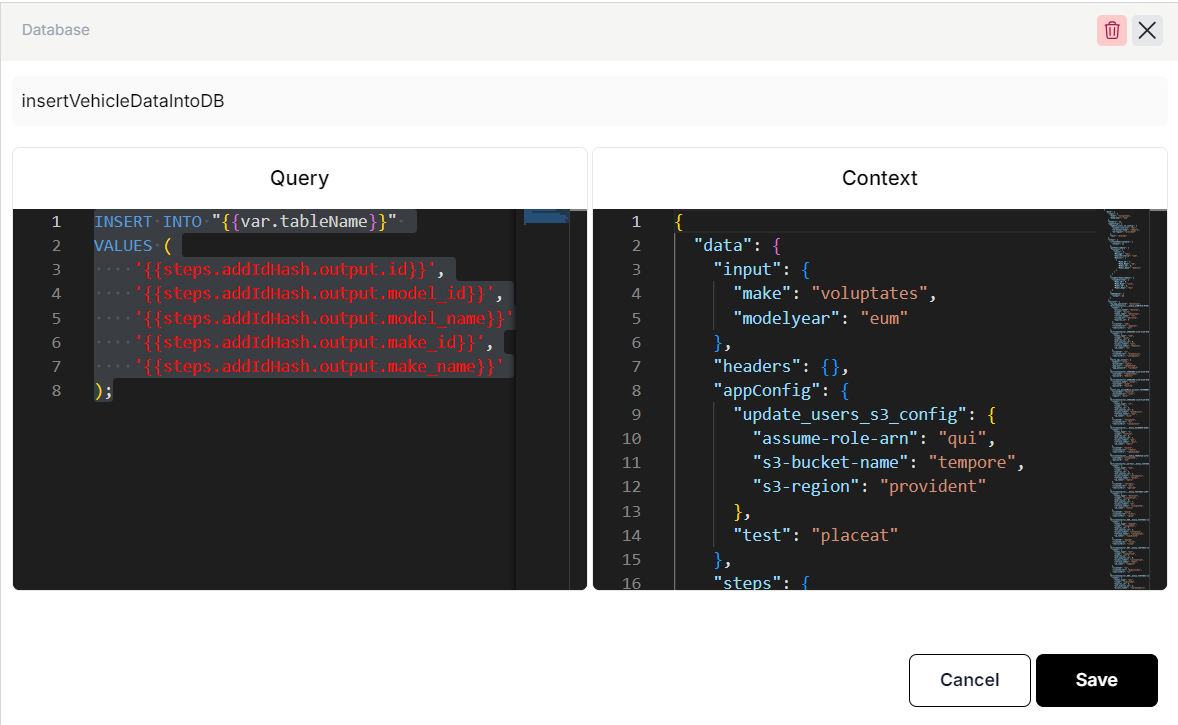
- Next we will add a
Databaseelement in the loop to store ourData Mapperoutput into the local database. We will enter the following query.
INSERT INTO "{{var.tableName}}"
VALUES (
    '{{steps.addIdHash.output.id}}',
    '{{steps.addIdHash.output.model_id}}',
    '{{steps.addIdHash.output.model_name}}',
    '{{steps.addIdHash.output.make_id}}',
    '{{steps.addIdHash.output.make_name}}'
);
-
This completes the loop that is transforming and storing the data.
-
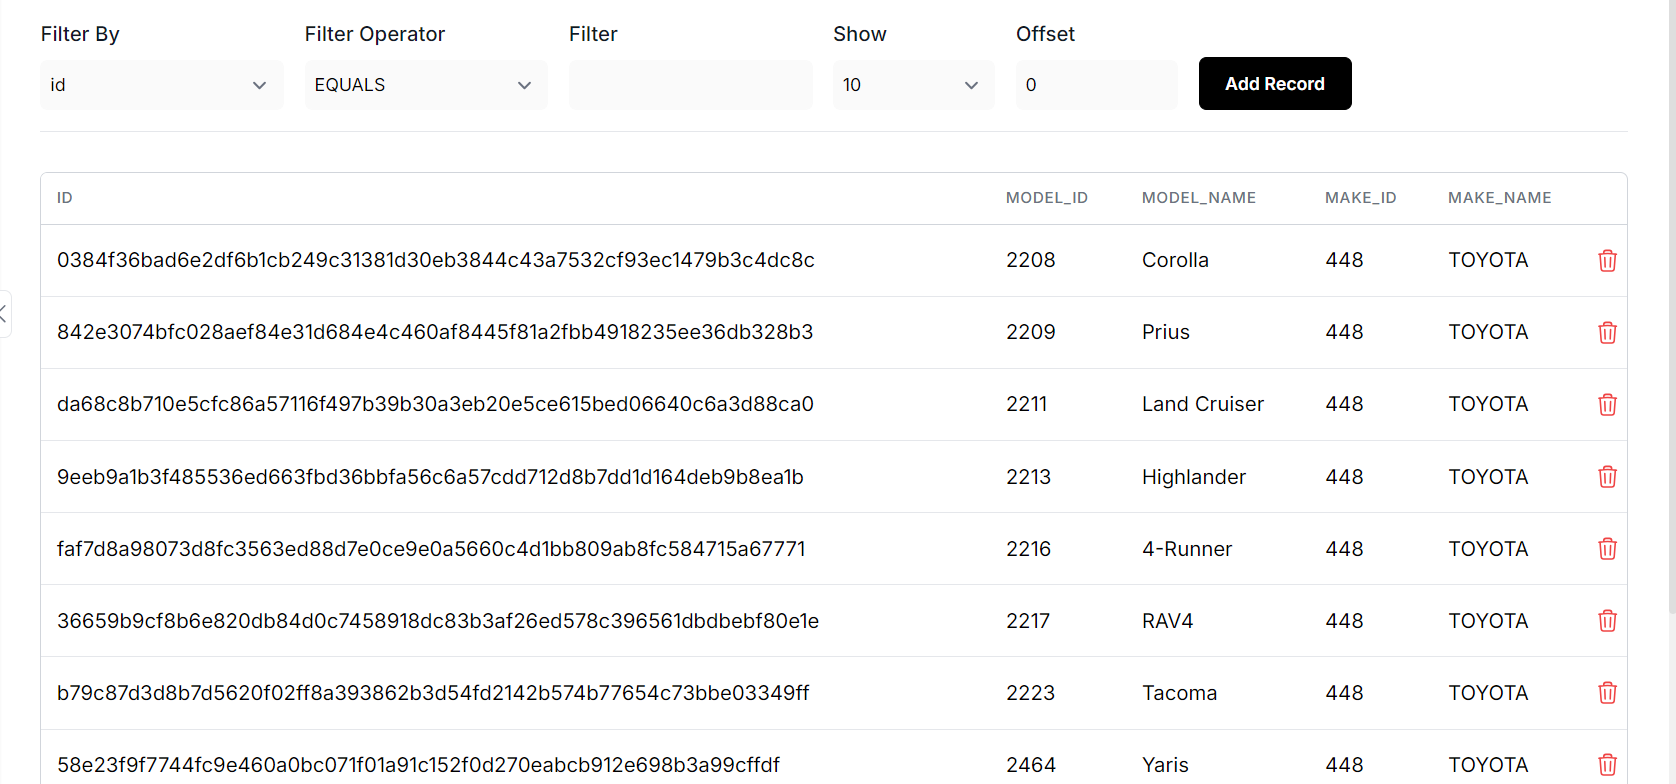
We can now run this flow in the debugger again and go to the
Databasesfrom the navigation menu on the left side to see our created table under the fastn DB.

- If we open the table we can see the populated contents inside including the id hash.
Part III - Exporting Data to Power BI
Creating a table and dataset
-
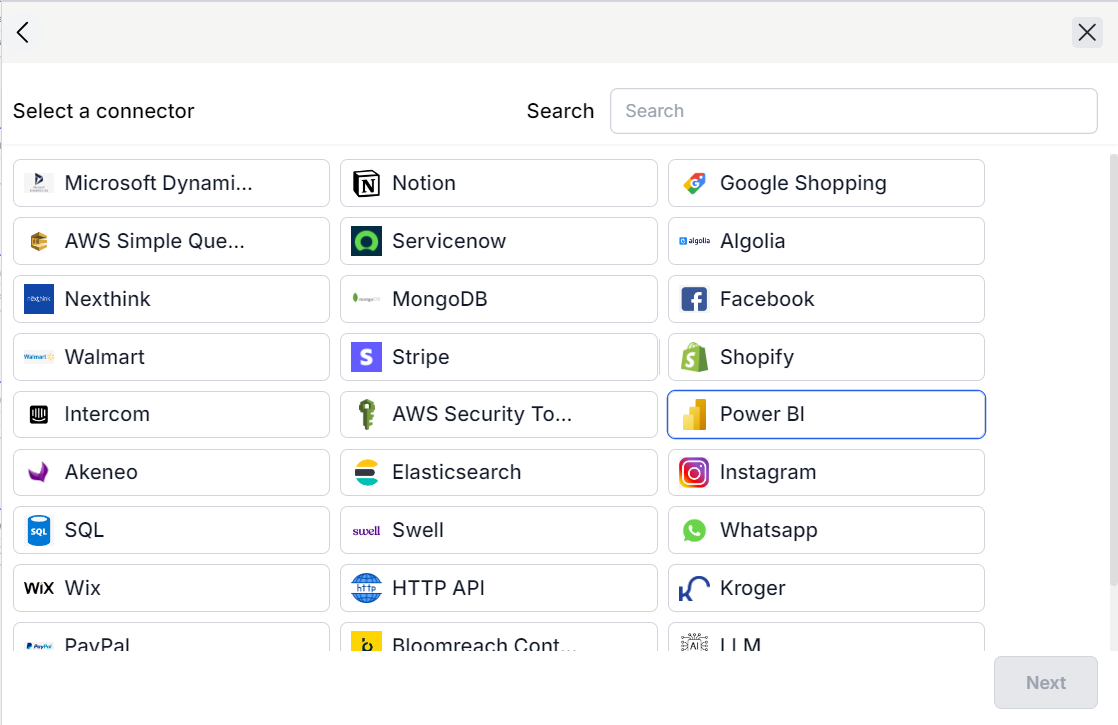
Once we have the data in the internal database we now need to export it to PowerBI. To do that we need to add a PowerBI connector.
-
Drag and drop a Connector element. Choose fastn connectors and select PowerBI from the list.
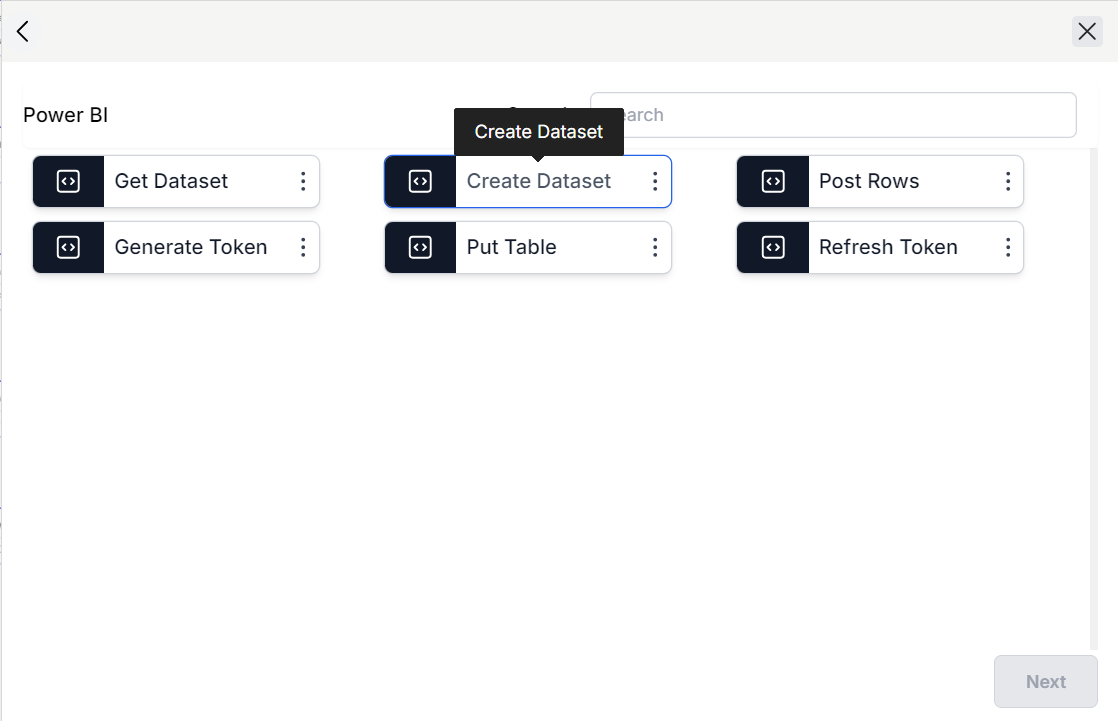
- The connector we need here is the
Create Datasetconnector.
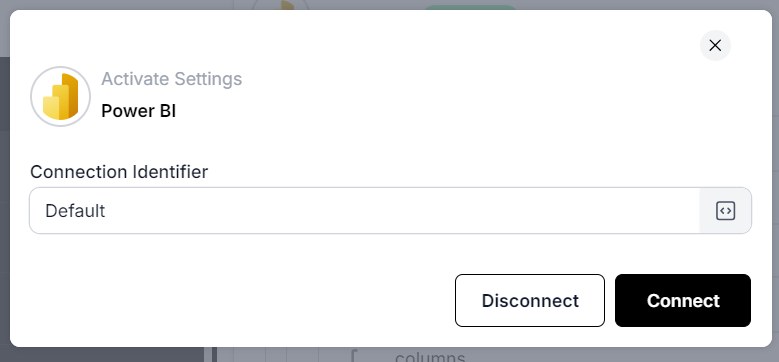
- In the next page we will see that the state of the connector is disconnected which means that it will not be able to authenticate unless we connect it.
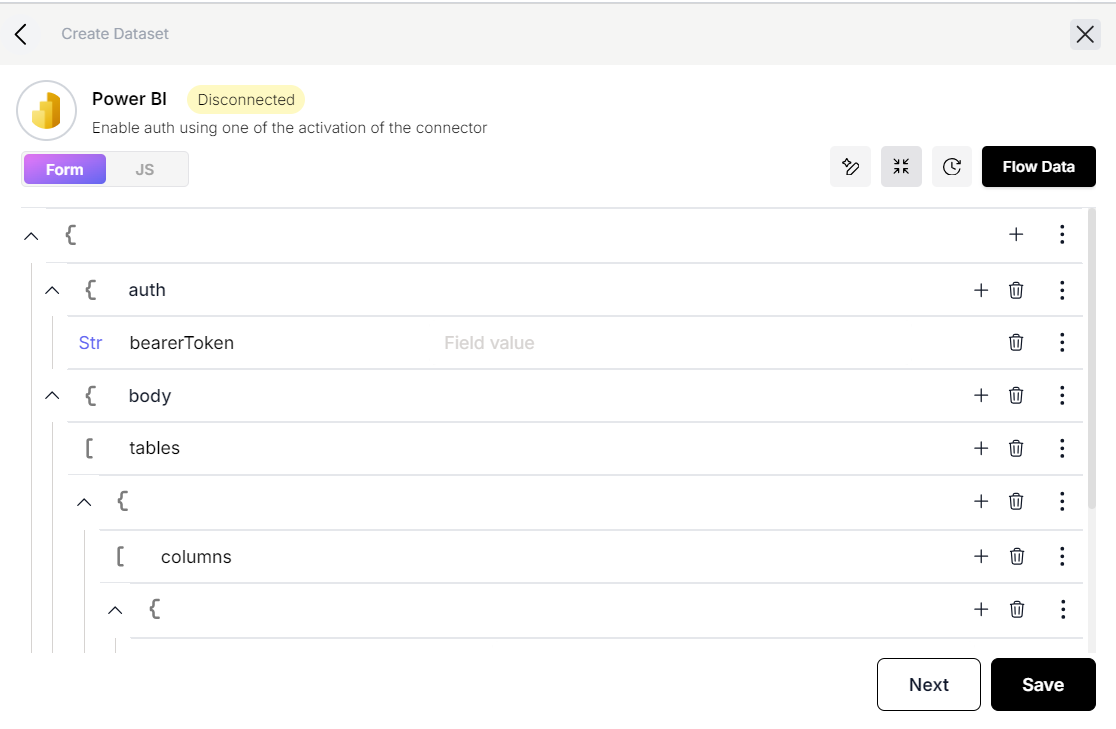
- To do that we need to go to
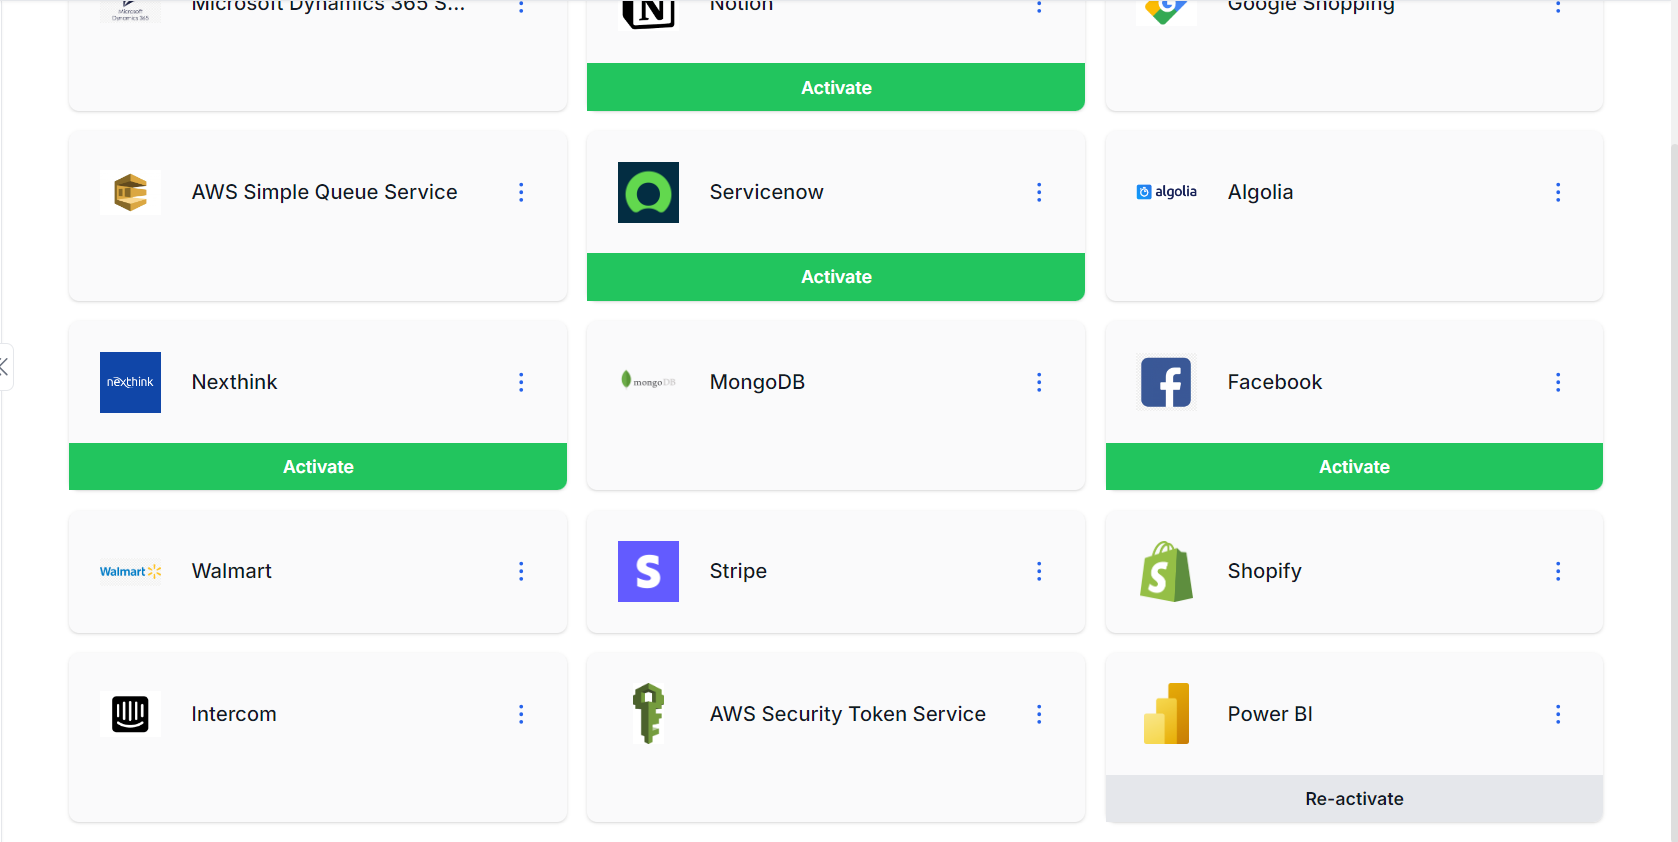
Connectorsfrom the left side menu. Find the PowerBI connector and click on theActivatebutton. This will redirect to the PowerBI login page where we will input our credentials.
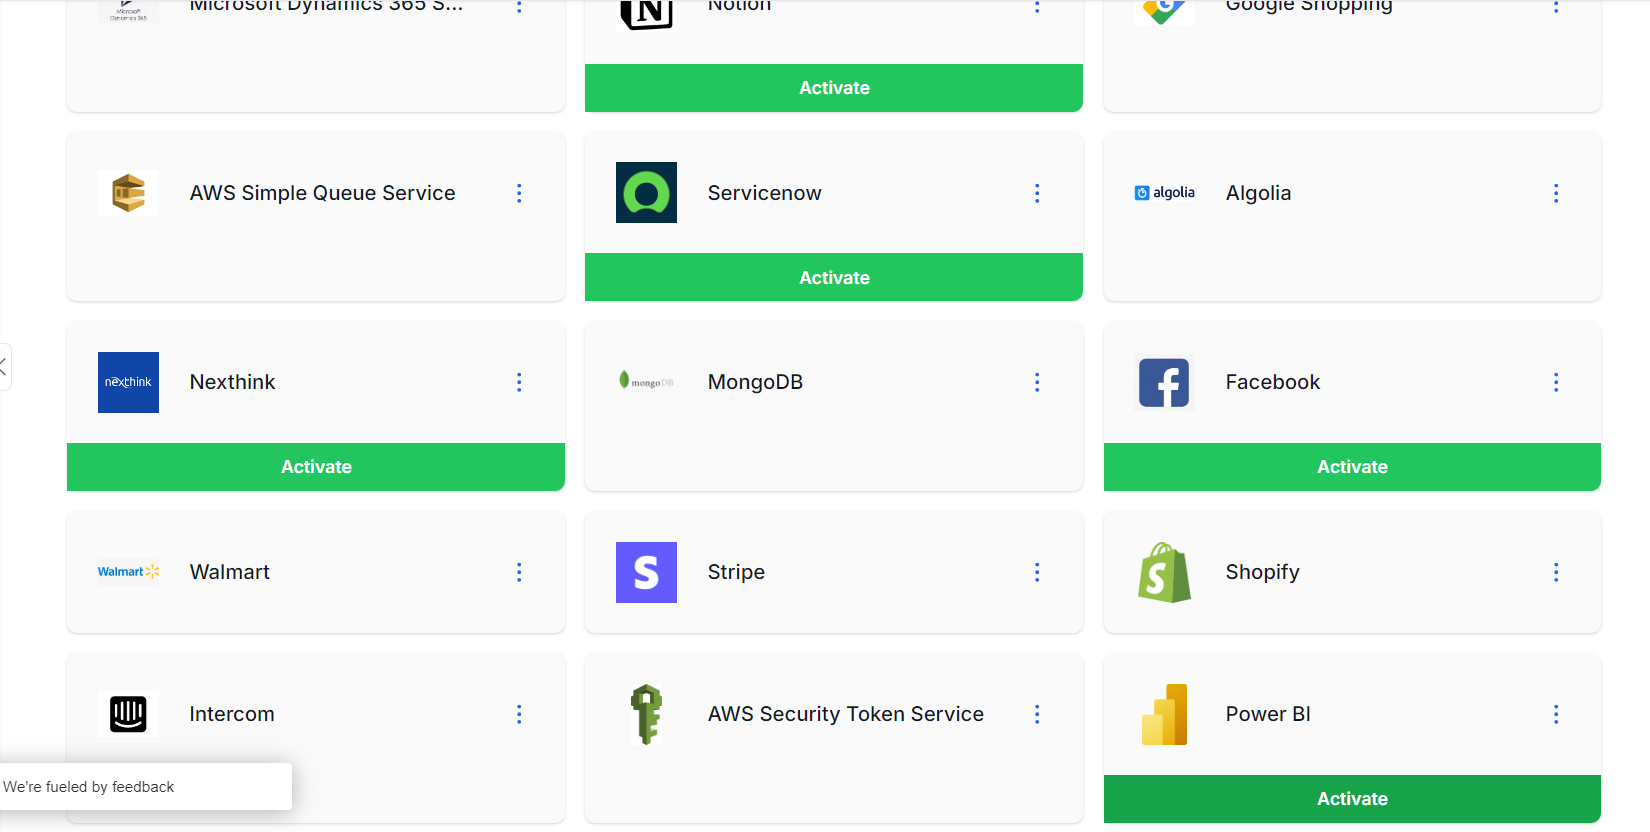
- Once the authentication is successful we will see the connector activation status updated.
- We can return to connector in our flow and click on the
Disconnectedlabel and pickDefault.
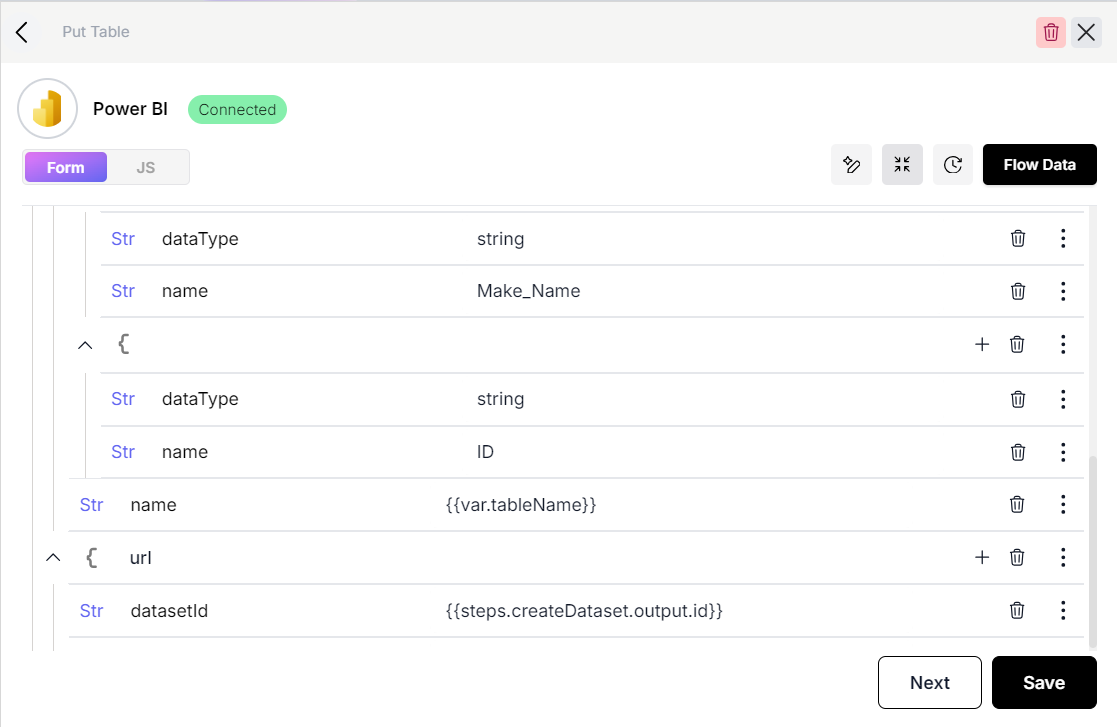
- After the connection is done we will setup the connector as shown below with the respective columns, table name and the dataset name.
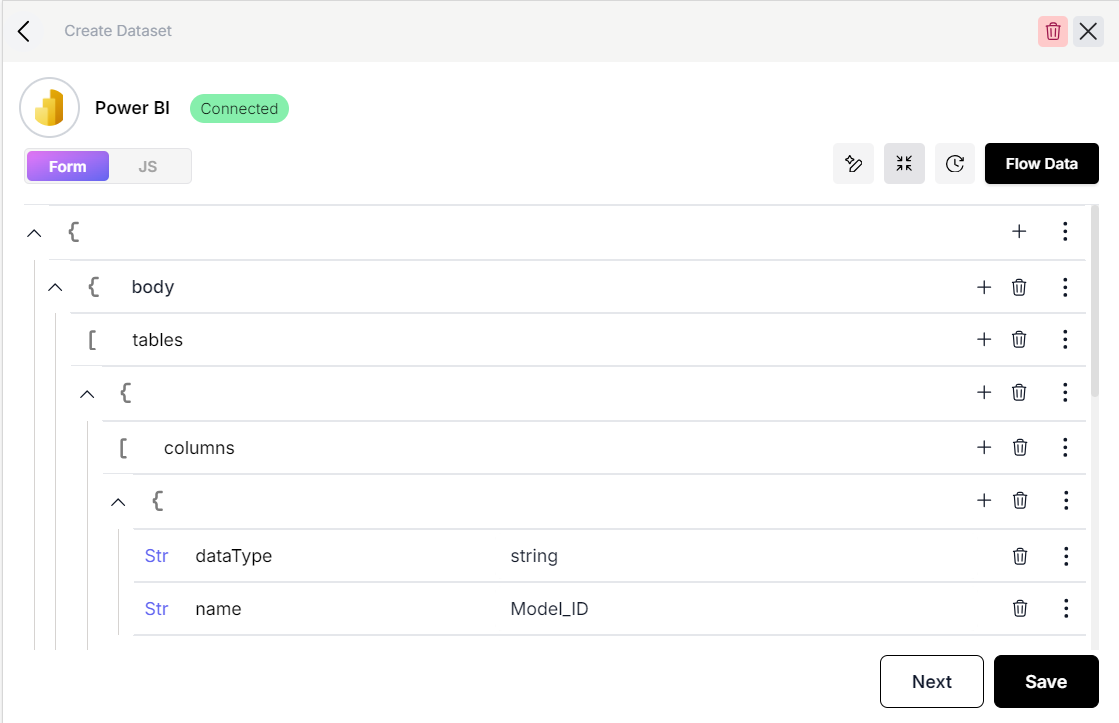
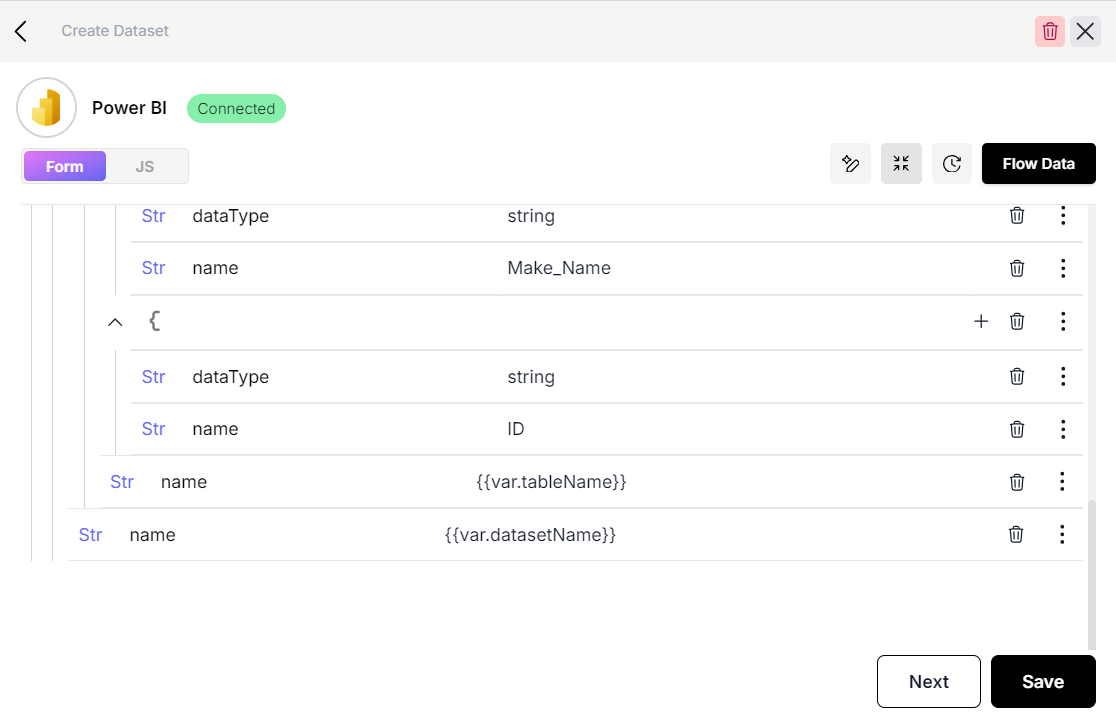
- We will add a variable for the dataset name in our
Variableselement as we will need to use this in multiple places.
-
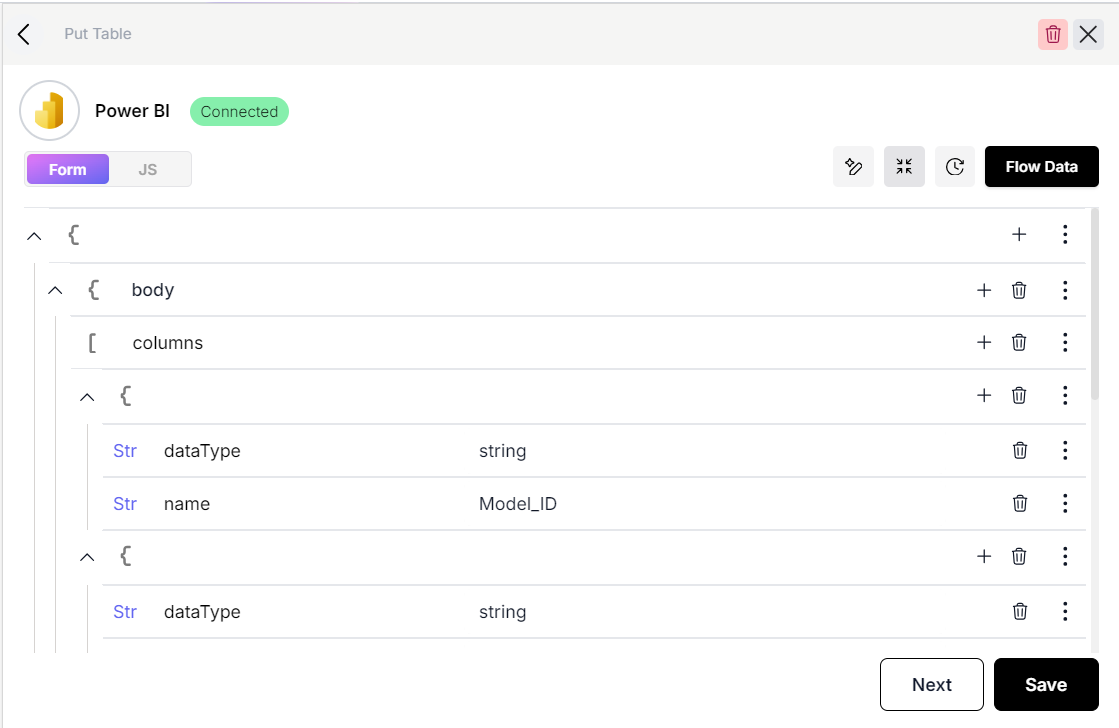
Similar to the
createDatasetconnector we will now add aputTableconnector and set it up as follows. -
We will click on the
Disconnectedlabel again and pick the default option.
- Here we also require a
datasetIdwhich is the output of the previouscreateDatasetstep.
{{steps.createDataset.output.id}}
Exporting data to PowerBI
-
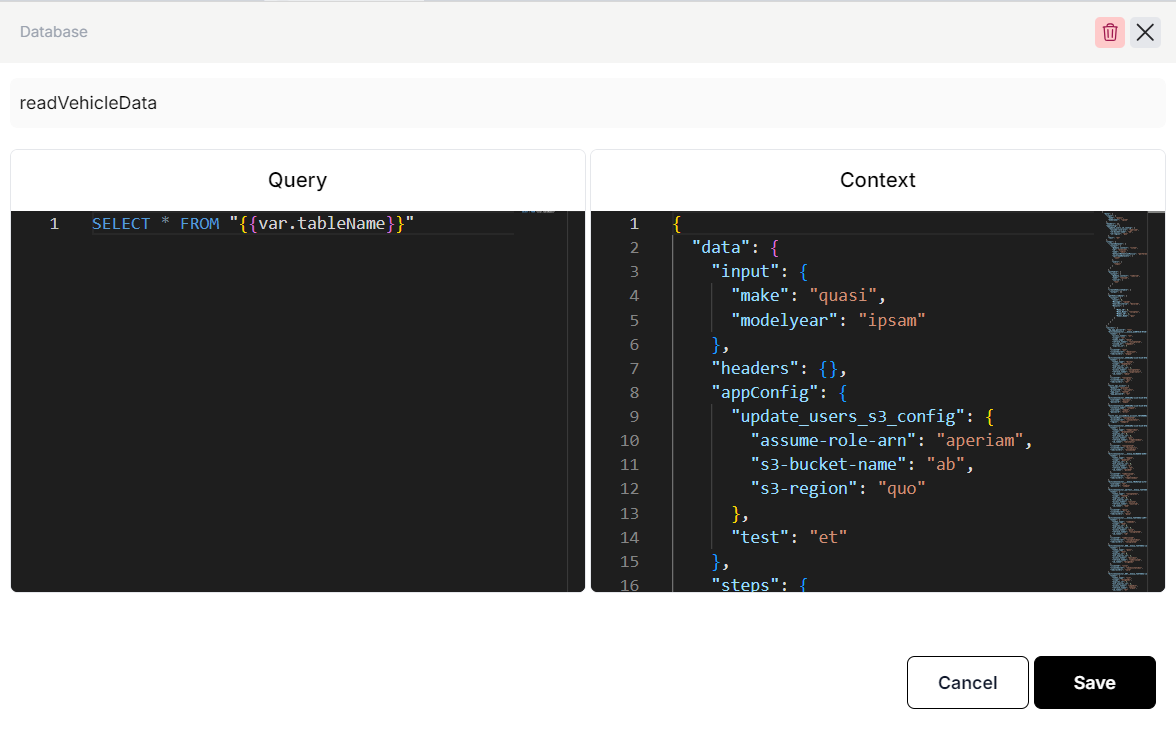
To export data we will add a
Databaseelement and configure it to read data from the table we created in the internal database. -
The query will be as follows.
SELECT * FROM "{{var.tableName}}"
-
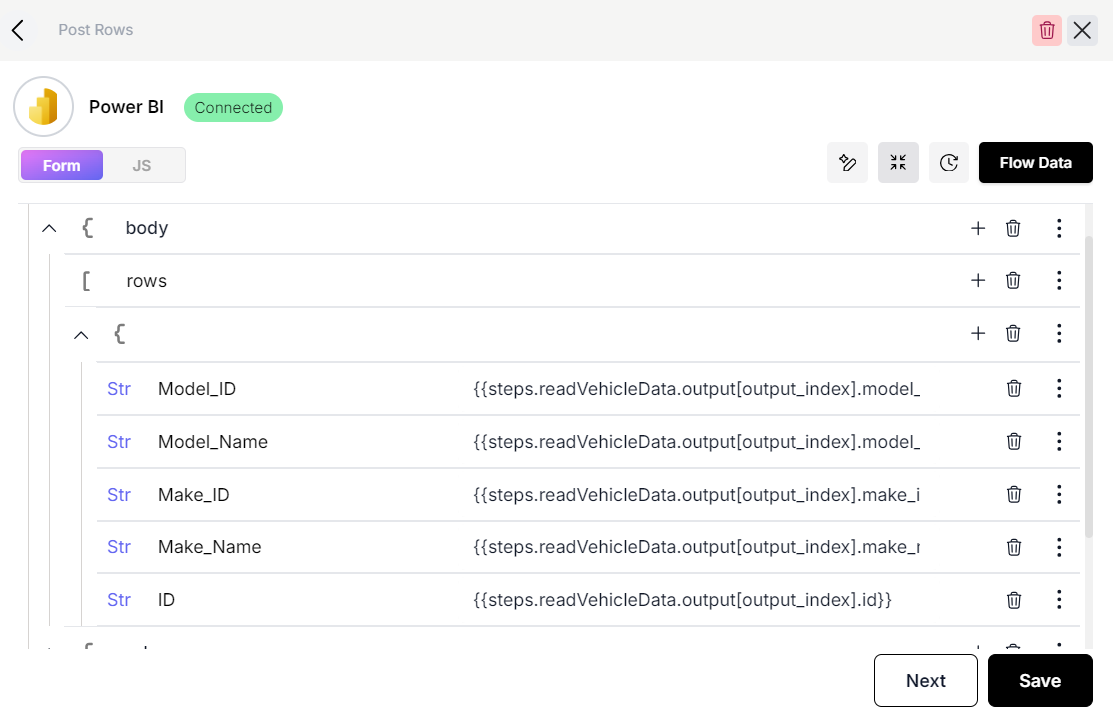
We now need another PowerBI connector called
postRowsthat will enable us to post the data as rows in out PowerBI table. ThepostRowsstep requires us to add all objects representing rows in the api request. This can be done by setting up a loop advanced action that will iterate over all the objects from the previous step and pass them in this step. -
To do this we will click on the three dots along the field titled
rows.
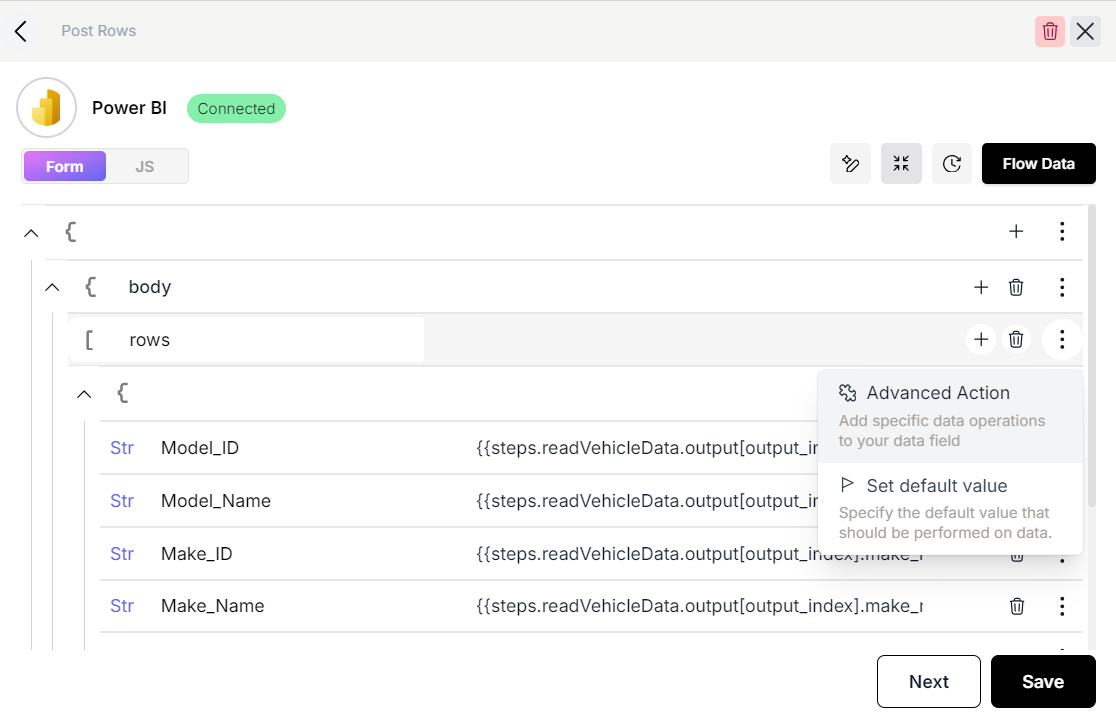
- We will pick the
Loopstep and set it up as follows.
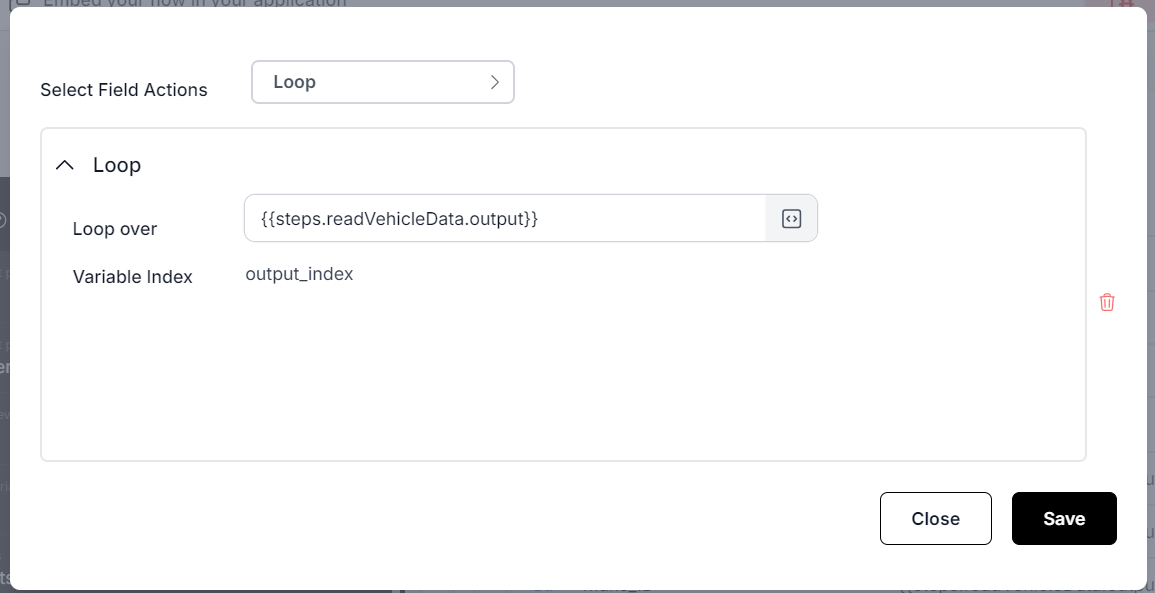
- This will create a iterator that will auto index the values we setup in the loop. And we can use them like so.
{{steps.readVehicleData.output[output_index].model_id}}

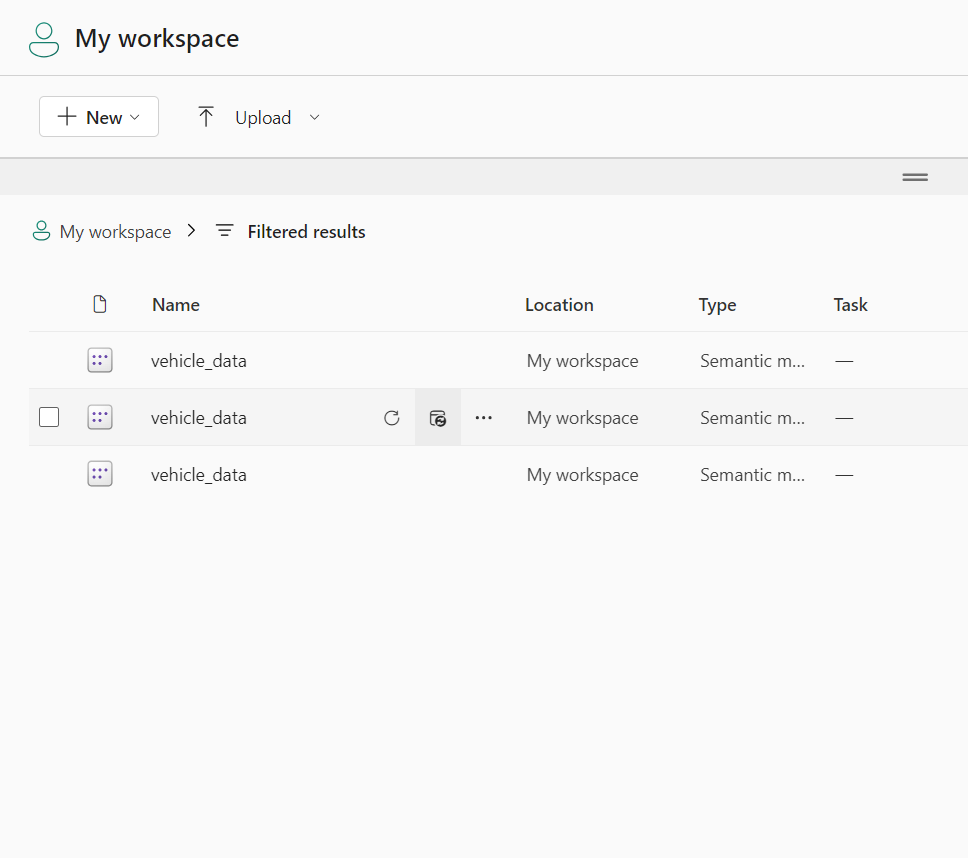
- Now if we run the flow in the debugger, it will export our data to PowerBI. We can login to the PowerBI workspace to see the dataset and data exported there.
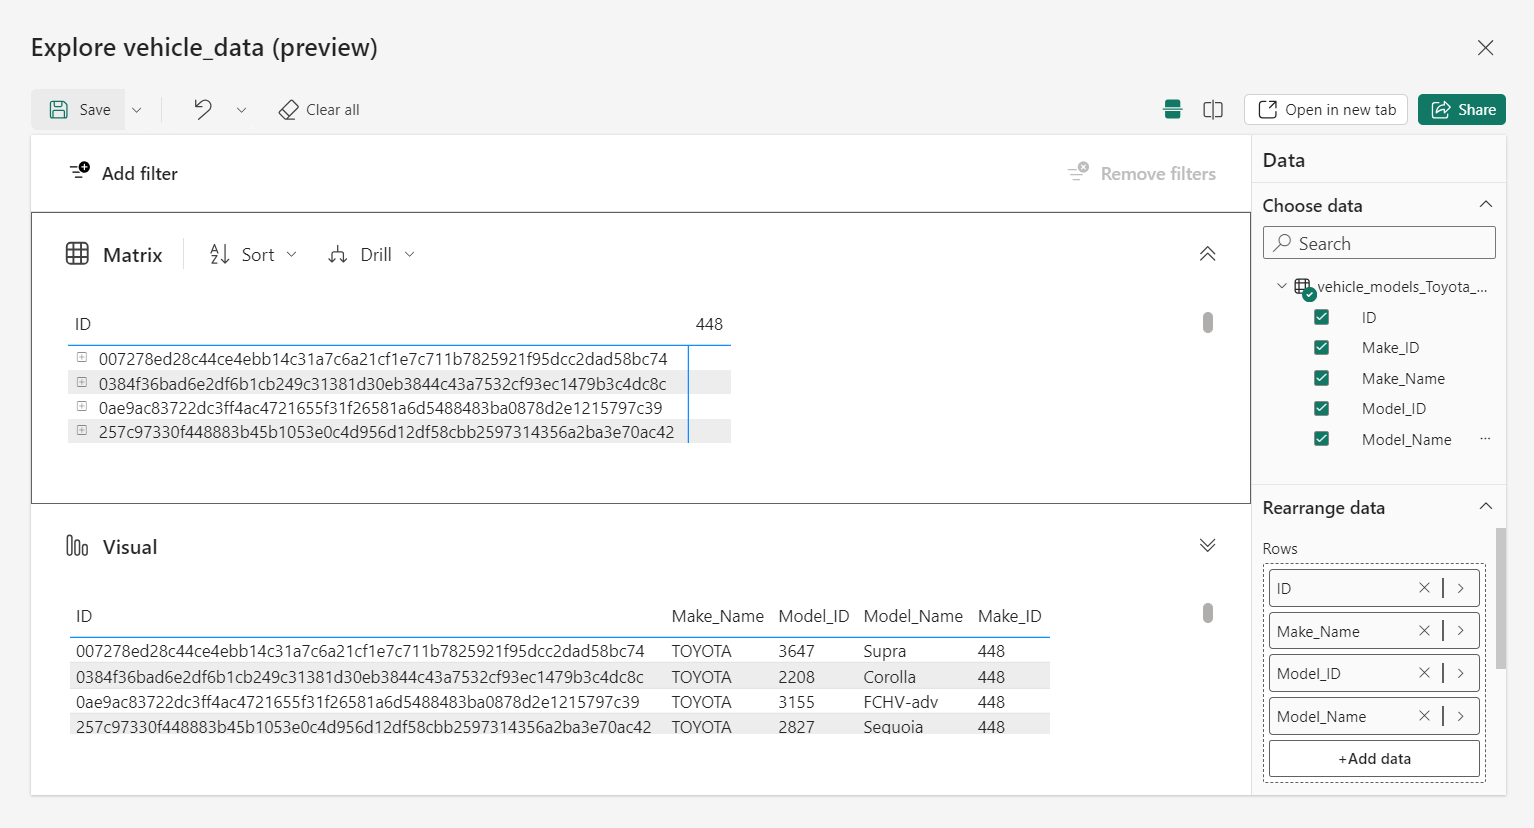
- This concludes the flow setup and it showcases how we can retrieve and transform data and export it via a connector.
Congrats on following this guide to the end!