Syndicate Data from Shopify to Commercetools
Learn how to move data between platforms using fastn connectors.
Introduction
In this guide, we are going to build a flow that showcases the potential of the fastn platform as one-stop solution for data syndication across multiple platforms. As an example, we are going to take a look at data syndication between Shopify and Commercetools.
Prerequisites
-
A Shopify account is required with a store setup and some products added as we are going to retrieve products for export.
-
A Commercetools account is required to authenticate the connector and export products.
Part I - Getting Data from Shopify
Activate the Shopify connector
-
As a first step, we need to activate the Shopify connector so that it can be authenticated and linked to the store from where we want to fetch our products.
-
To activate the connector go to the Connectors page from the Navigation menu on the left.
-
Go to fastn connectors and find the Shopify connector.

- Click on the "Activate" button and fill in the parameters for the store name.
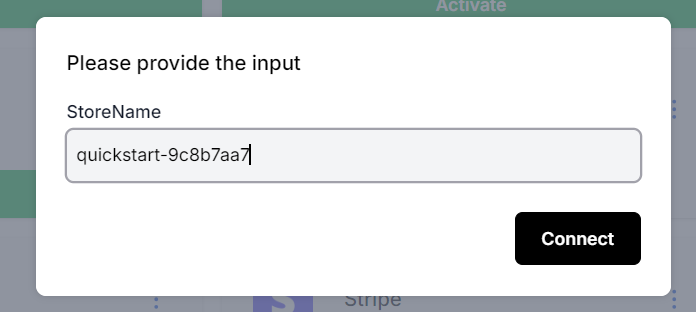
- To get the store name, go to your Shopify store and copy the store name from the URL like shown below.

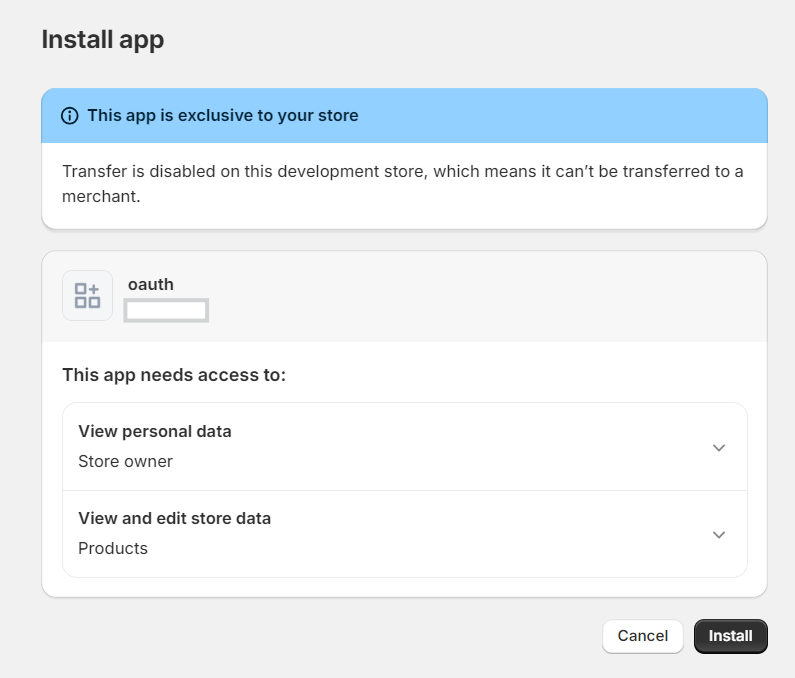
- The authentication will then redirect and ask for permissions. Click on "Install".
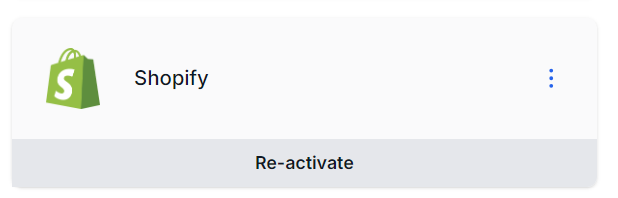
- After activation the connector status will update.
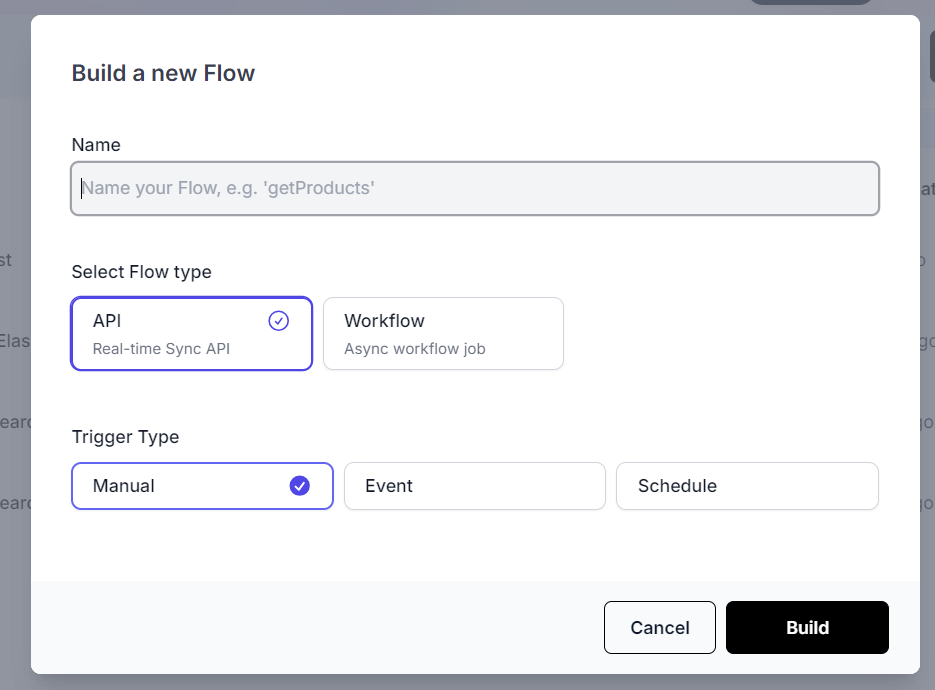
Create a new flow
- To start off, go to the "Flows" page from the left side menu. And add a new Flow.
- Give your flow a name. And create it as an API.
Get products from Shopify
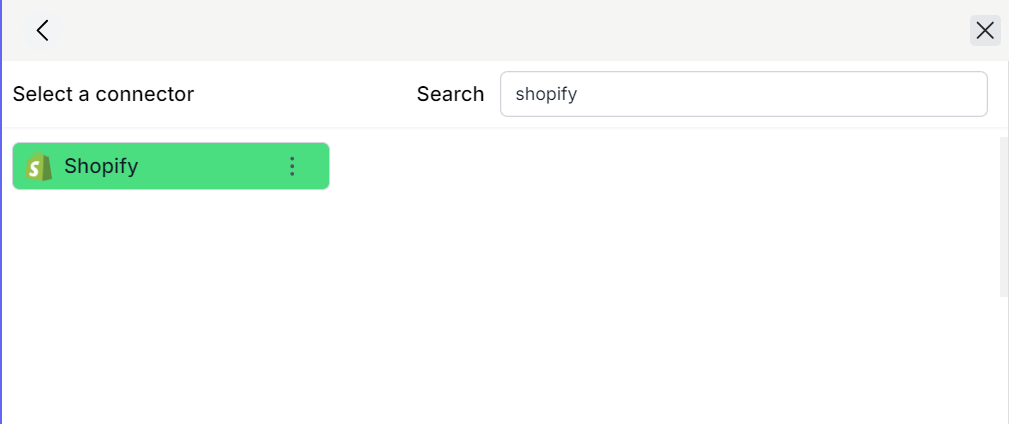
- Drag and drop a connector element. Choose fastn connectors and find Shopify.
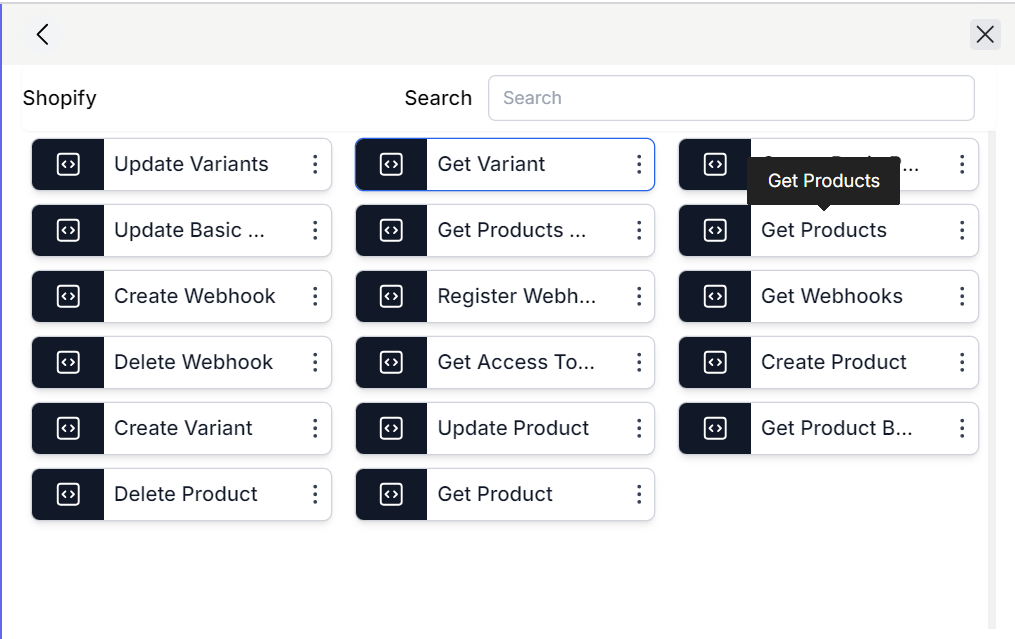
- Choose the "Get Products" API.
-
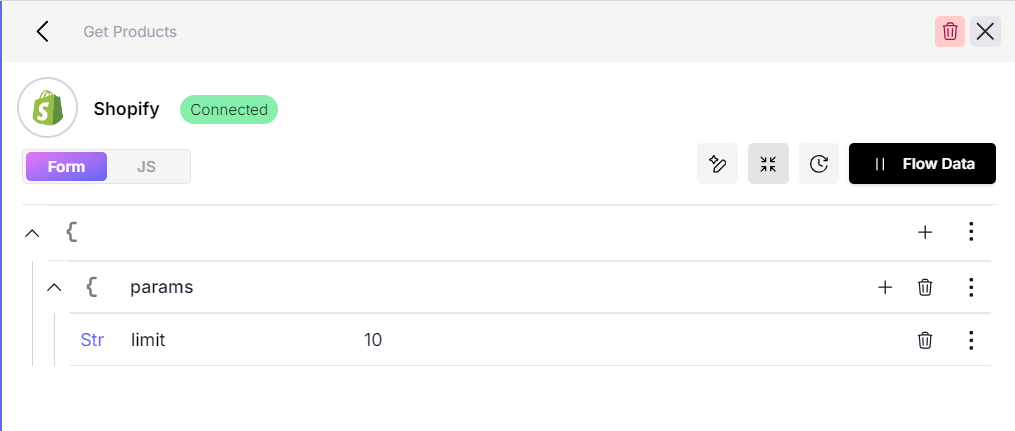
Once the connector configuration opens up. Click on the "Disconnected" label next to the icon and select the "Default" option.
-
Click on "Connect" and the connector status will be updated to "Connected".
-
Setup the connector parameters as in the image below. In this example we set the limit to 10 but it can be set to suitable alternate values or can be set through the flow input.
Part II - Moving Data to Commercetools
Activate the Commercetools connector
-
Like we did for the Shopify connector, we are going to activate the Commercetools connector.
-
To activate the connector go to the "Connectors" page from the Navigation menu on the left.
-
Go to fastn connectors and find the Commercetools connector.

- Click on the "Activate" button and fill in the parameters required for the authentication.
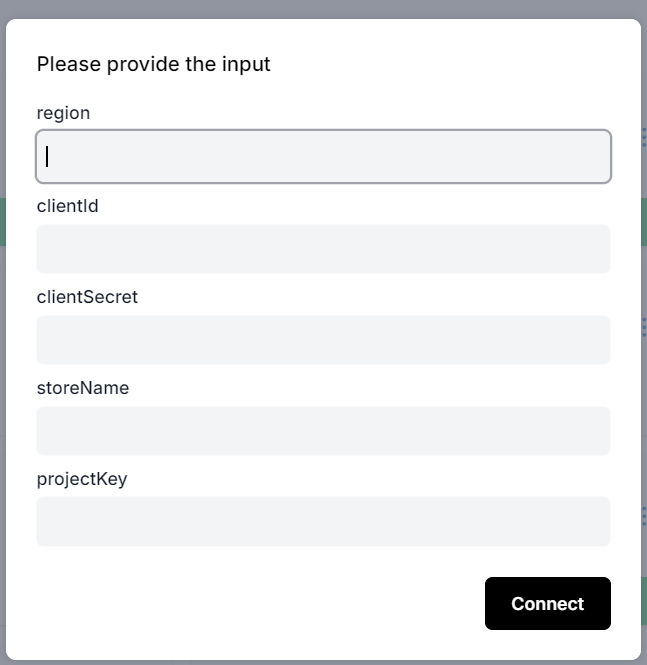
- After activation the connector status will update.

Transforming and exporting data
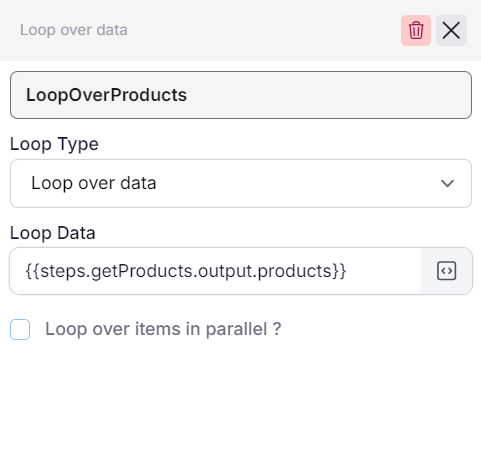
- Add a "Loop" step and set it up as "Loop over Data" and to loop over the output of the Shopify "Get Products" API.
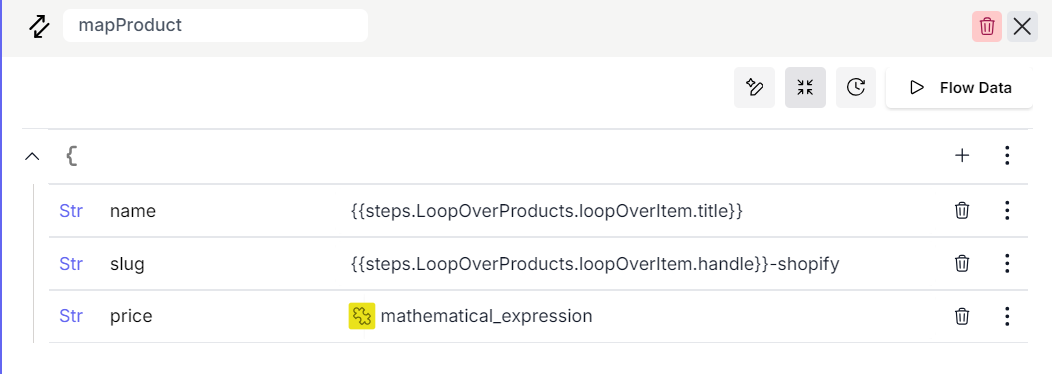
- Inside the loop, add a Data Mapper step. The data mapper can be used map and transform data. For the purposes of this example we are going to map the product name, slug and price.
-
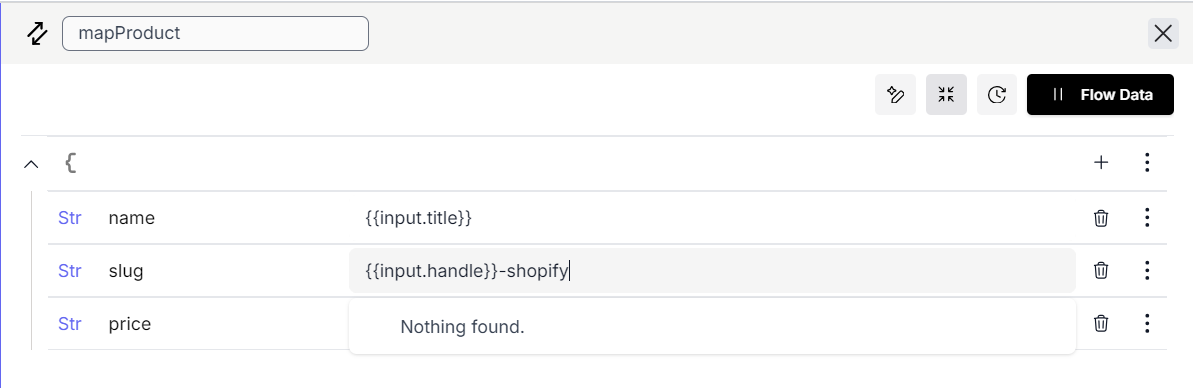
The product name is called title in Shopify so we will map that field.
-
To give a suitable value to the product slug we will use the handle field and additionally append "-shopify" to the string to indicate that we imported this product from Shopify.
-
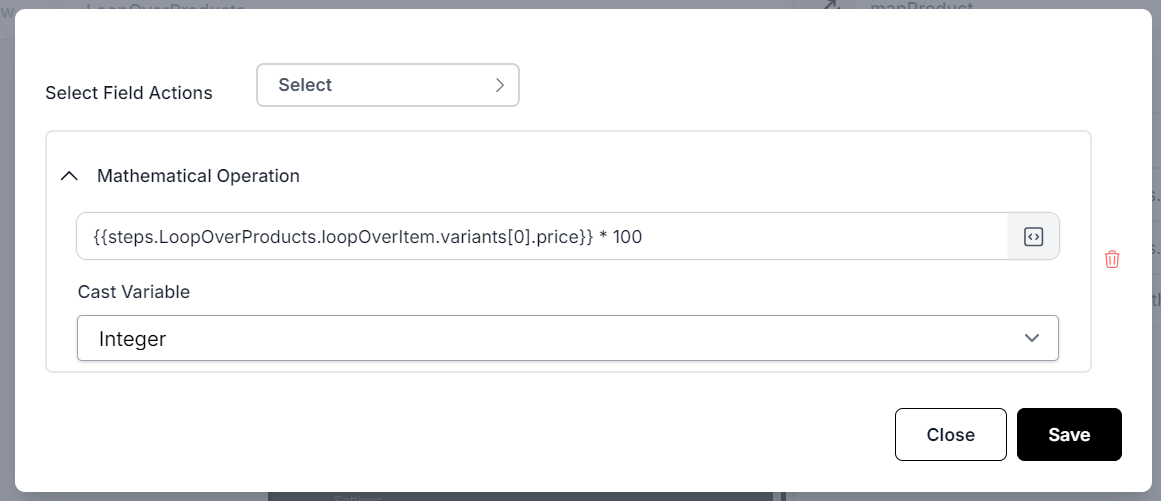
We will apply a mathematical expression to the price as Commercetools expects price to be in cents so we will multiply the price by 100 to convert it into cents.
-
After the mapper, drag and drop a connector element. Choose fastn connectors and find Commercetools.
-
Choose the "Create Product" API
-
Once the connector configuration opens up. Click on the "Disconnected" label next to the icon and select the "Default" option.
-
Click on "Connect" and the connector status will be updated to "Connected".
-
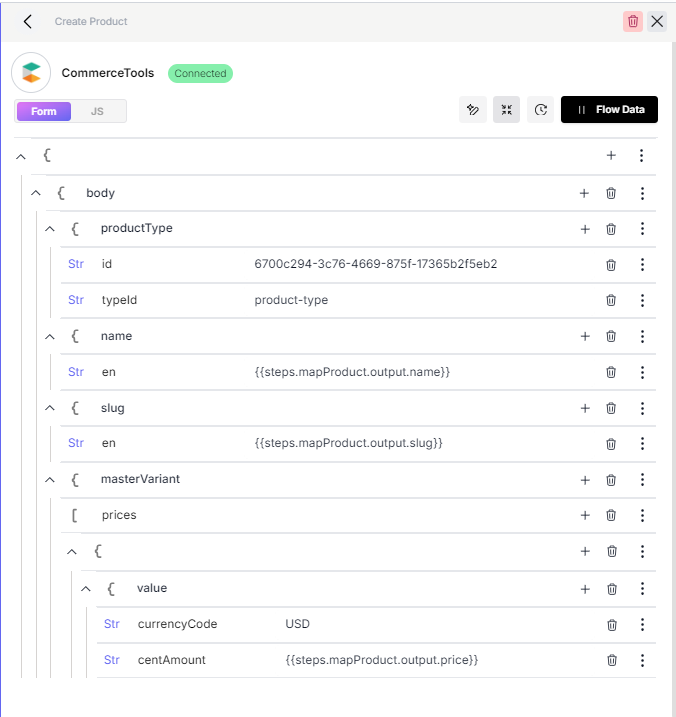
Set it up as shown in the image below with the mapped output variables from the data mapper step.
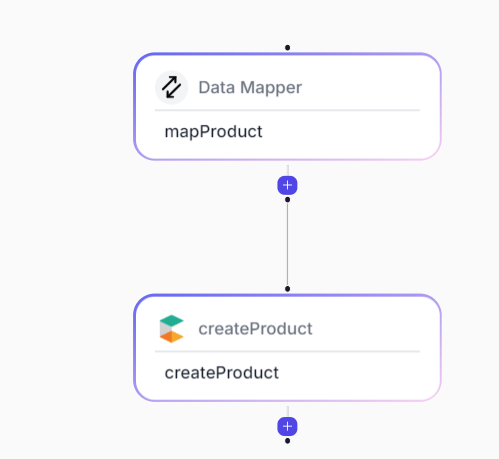
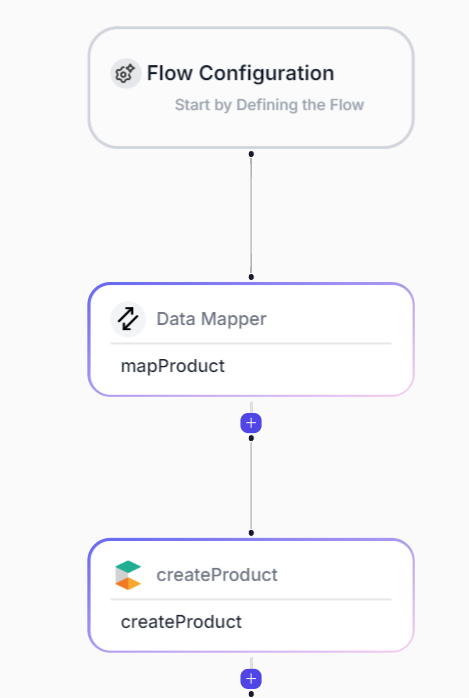
- The sub-flow inside the loop will be as shown in the image below.
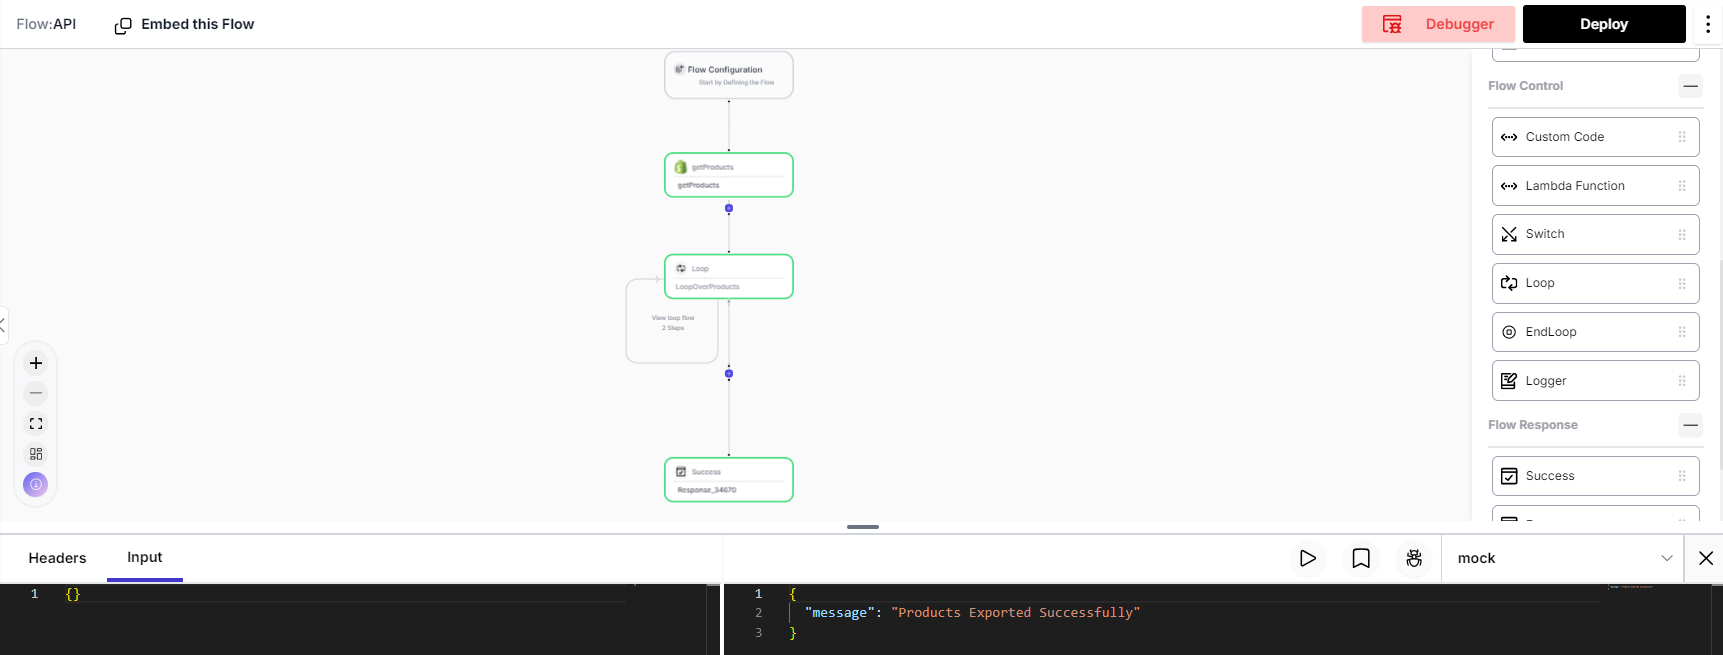
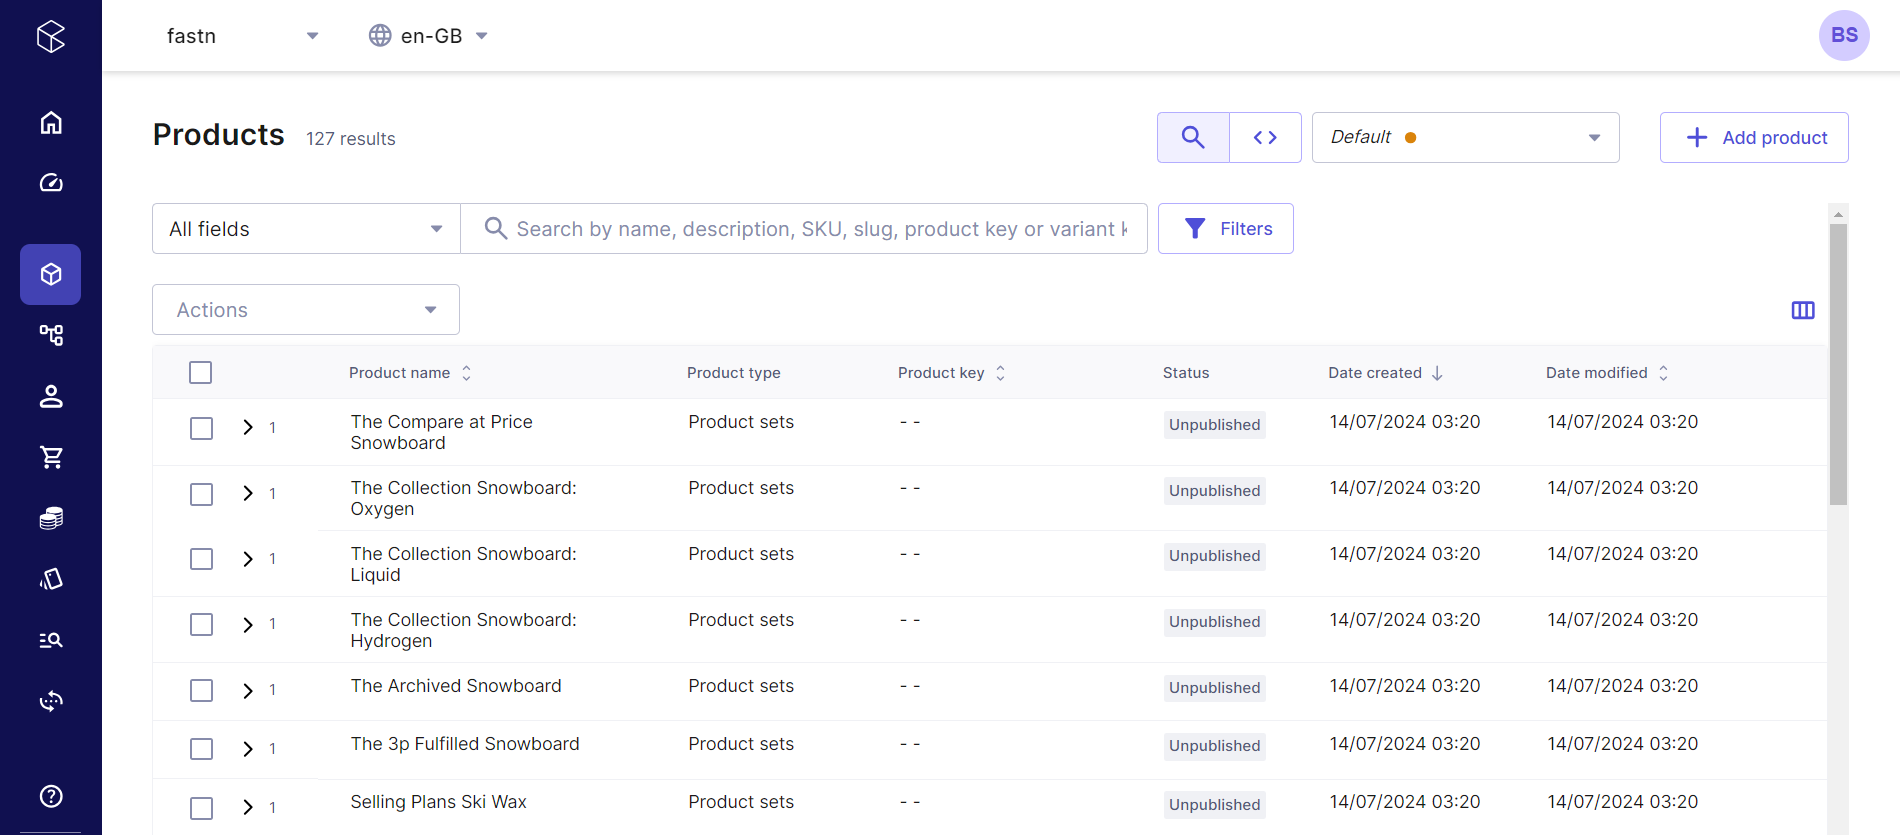
- We can also test the complete flow using the "Debugger" and see products exported to Commercetools.
Part III - Setting up a Webhook for Product Updates
The flow created in Parts I and II, does bulk real-time export to Commercetools. Now we are going to take a look at how we can set product updates so that whenever a product is created in Shopify it is exported to Commercetools.
Creating an update flow
-
We are going to create a new flow and give it a name.
-
This flow is going to be activated with a webhook. Whenever a new product is added, Shopify is going to call our webhook.
-
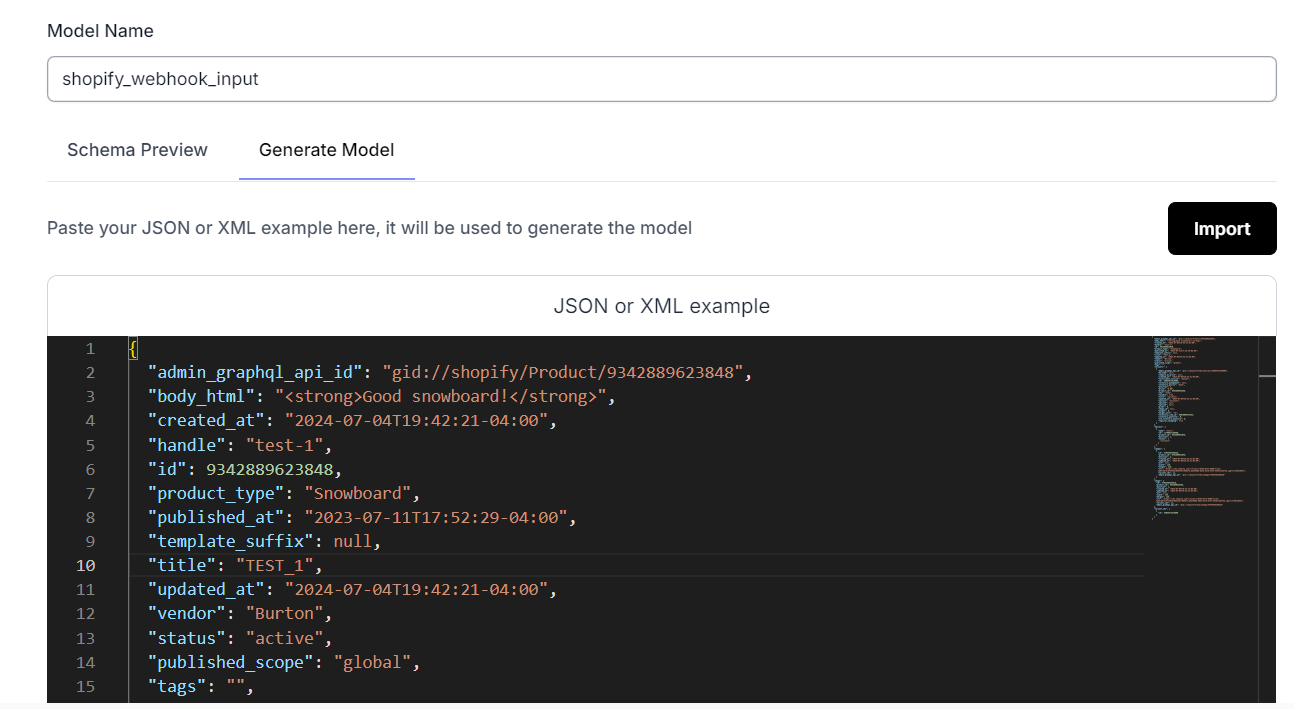
In the "Flow Configuration" step, we are going to define an input schema corresponding to the product data that the webhook will be called with. Click on the step and add a new model.
- We are going to give the model a name. In the "Generate Model" tab, paste the JSON object model of the Shopify webhook body which is the format that new product updates will be sent. Click on "Import" to automatically generate the input model and save it.
-
Next, as we did in Part II, we are going to set up a data mapper and a Commercetools "Create Product" API step, so that each webhook input is used to create a product in Commercetools.
-
In the data mapper we are going to use values from the input as shown in the image below.
- We will setup the "Create Product" connector as in Part I to complete the update flow.
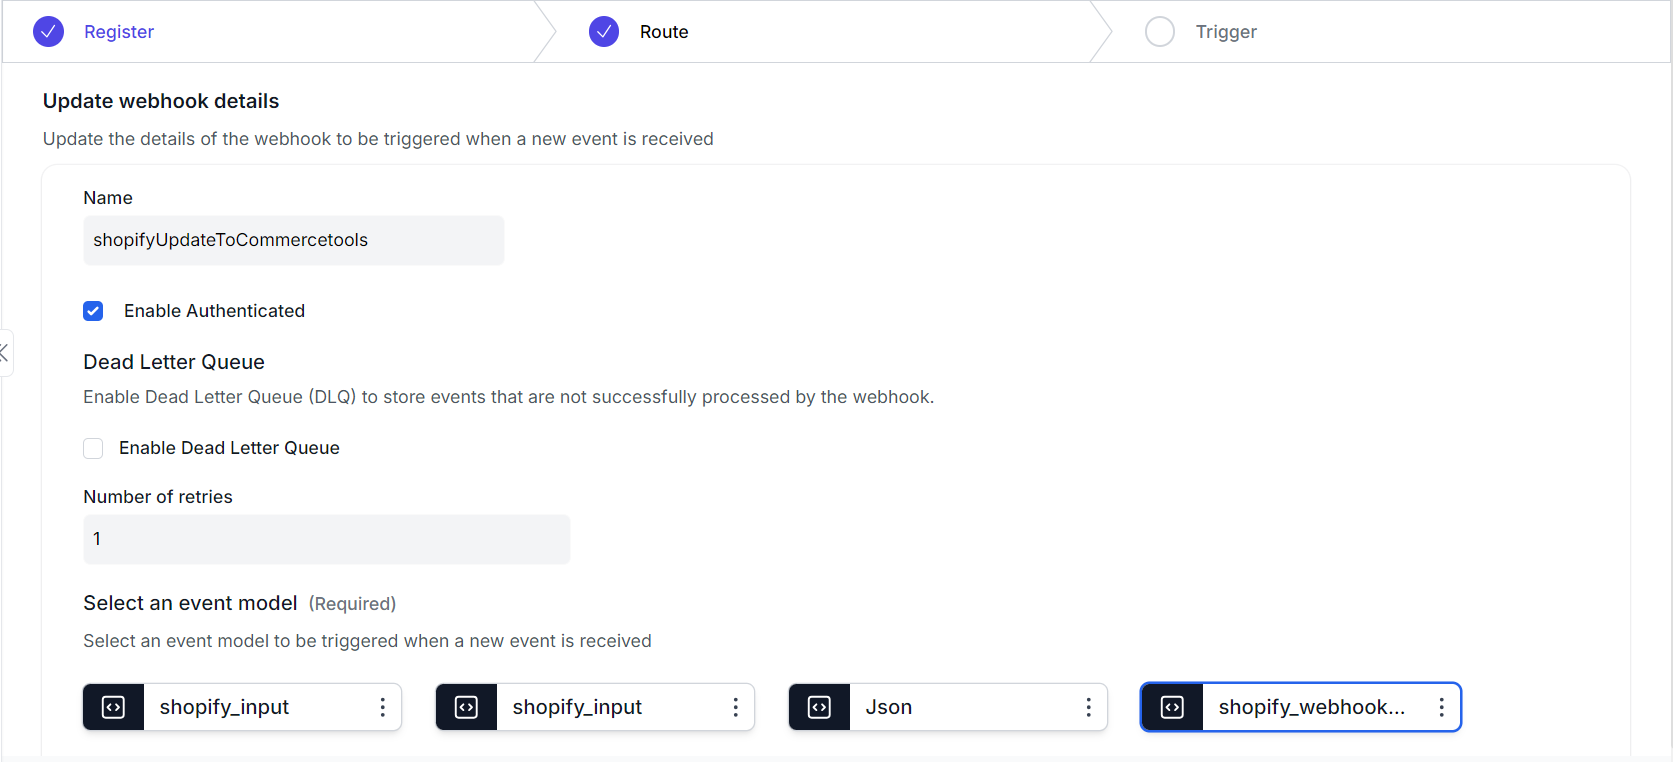
Setting up a webhook
-
Go to the Webhooks page from the Navigation menu on the left side.
-
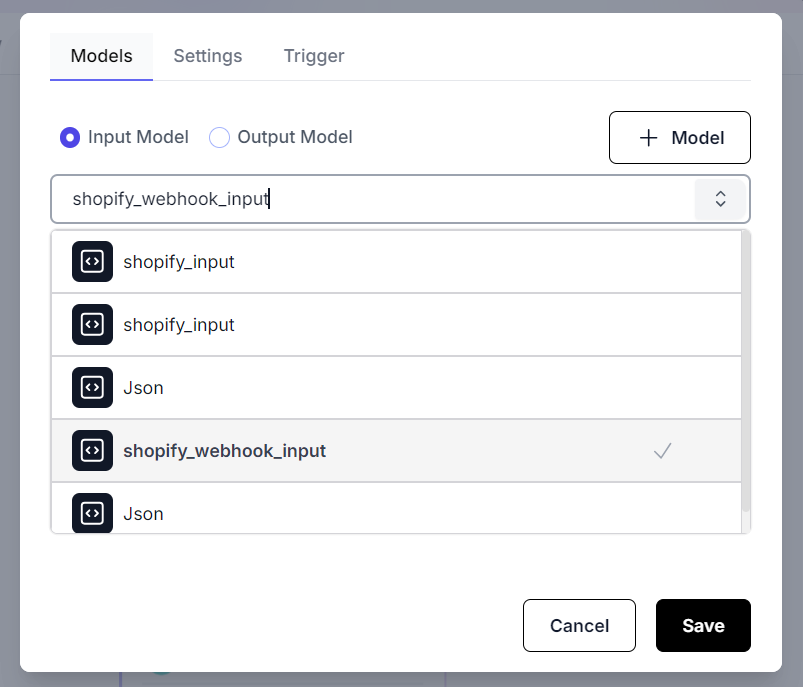
Create a new webhook and select the input model we previously created for the webhook.
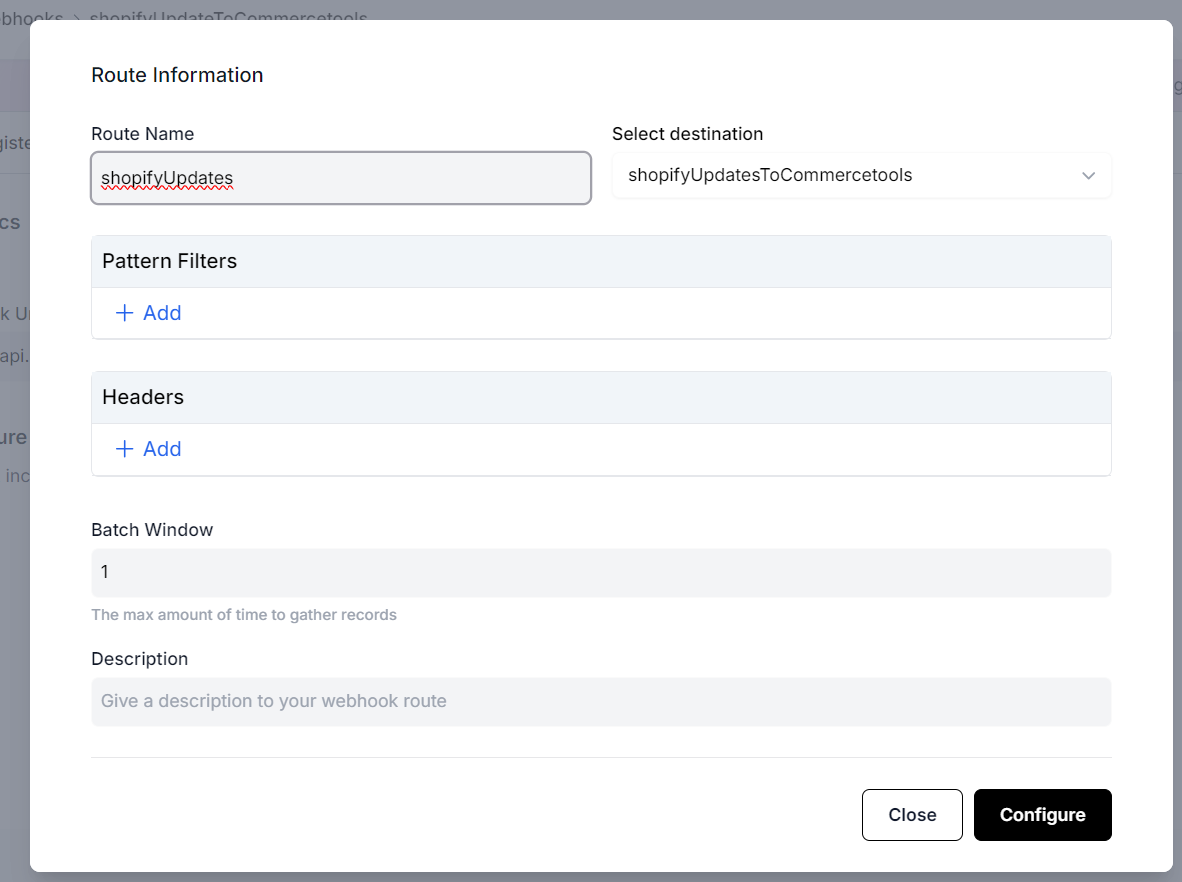
- Navigate to the "Routes" tab and setup a new route. Select the update flow as the destination.
- Copy the webhook URL. Whenever webhook URL is called, our configured route will be triggered which in this case is the update flow.

-
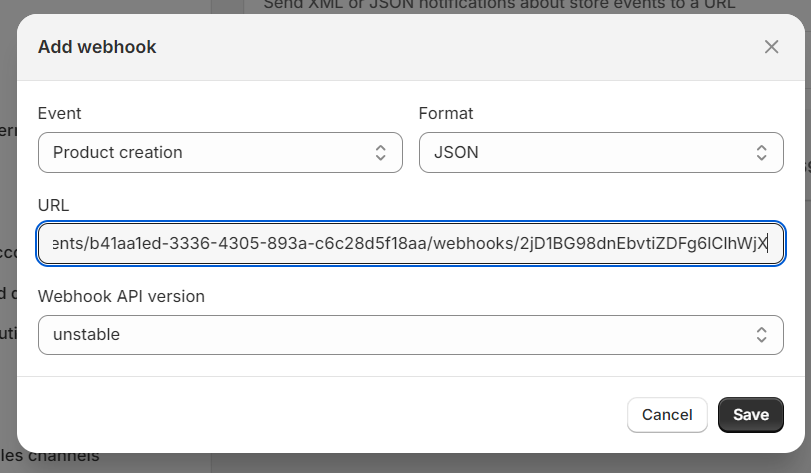
Next, we are going to link the webhook URL in Shopify. In your Shopify dashboard, navigate to Settings -> Notifications -> Webhooks and create a new webhook. Note: this step can alternatively be done through the Shopify connector's "Create Webhook" API.
-
Set it up to be triggered by "Product creation" and add the fastn webhook URL.
- This completes the setup. Whenever the "Product creation" event is raised in Shopify it will trigger the webhook to start the product update export to Commercetools.
Congrats on following this guide to the end!