For the complete documentation index, see llms.txt. This page is also available as Markdown.

Triggers

What starts a workflow — an inbound webhook, a schedule, or an event from a connected system.

Integrations → Triggers · /integrations?tab=triggers

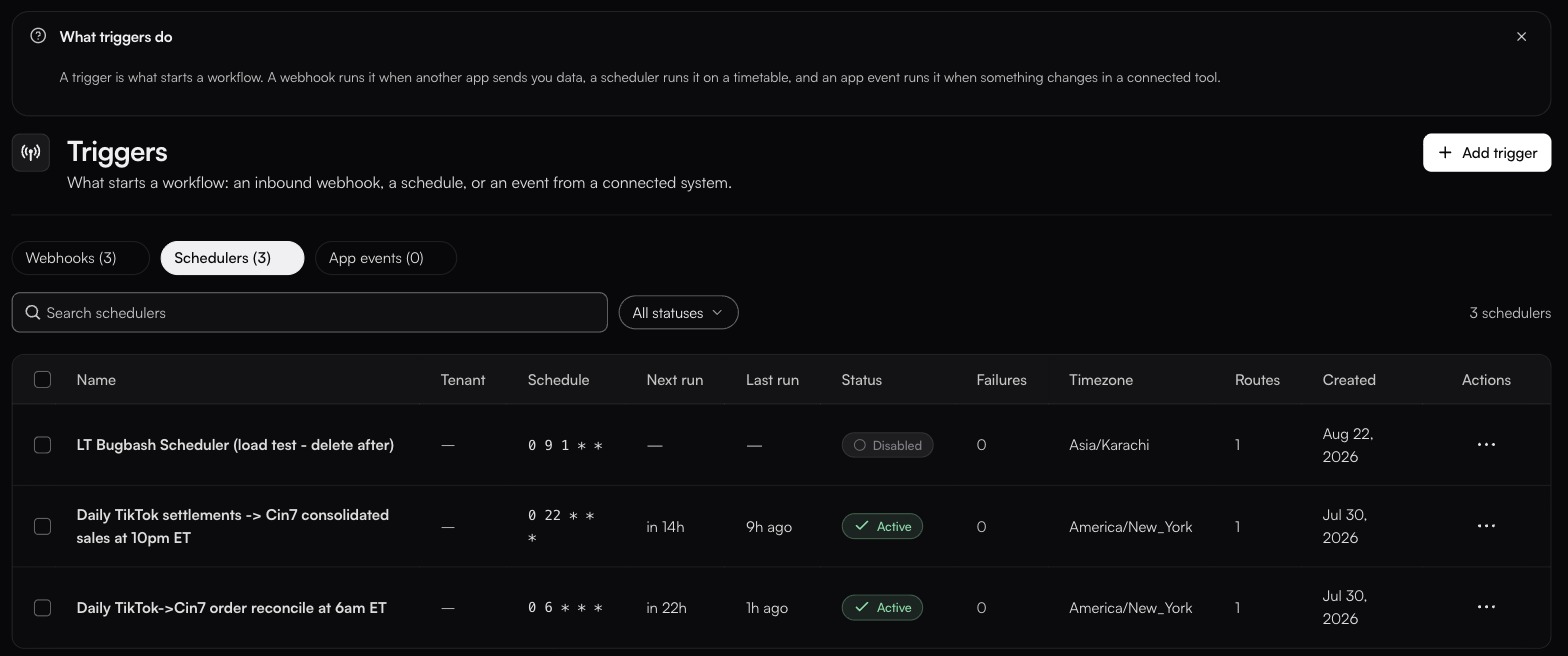
The Triggers page on the Schedulers tab beside Webhooks (3) and App events (0): three rows with columns Name, Tenant, Schedule showing cron expressions, Next run, Last run, Status as Disabled or Active pills, Failures, Timezone, Routes, Created and Actions
The dismissible What triggers do banner explains all three types before you pick one. The Schedule column shows the cron each trigger compiles to.
A workflow with no trigger only runs when something calls it. A trigger is what makes it run on its own.

The page splits into three sub-tabs — Webhooks, Schedulers (?trigger=scheduler) and App events (?trigger=app) — with a status select offering All statuses, Active and Disabled.

Each list paginates, with a footer reading Page 1 of 4 · 30 total and Previous/Next controls. A trigger you just created may be on a later page rather than missing — check the count before you conclude it failed. Every table also carries a leading select-all checkbox.

One concept, several labels. The dialog calls it Schedule, the sub-tab Schedulers, the browser title Scheduled triggers, and a trigger's own Type field Scheduler. They are all the same thing. These pages say schedule trigger throughout, and the list you want is the Schedulers tab.

Choosing a type

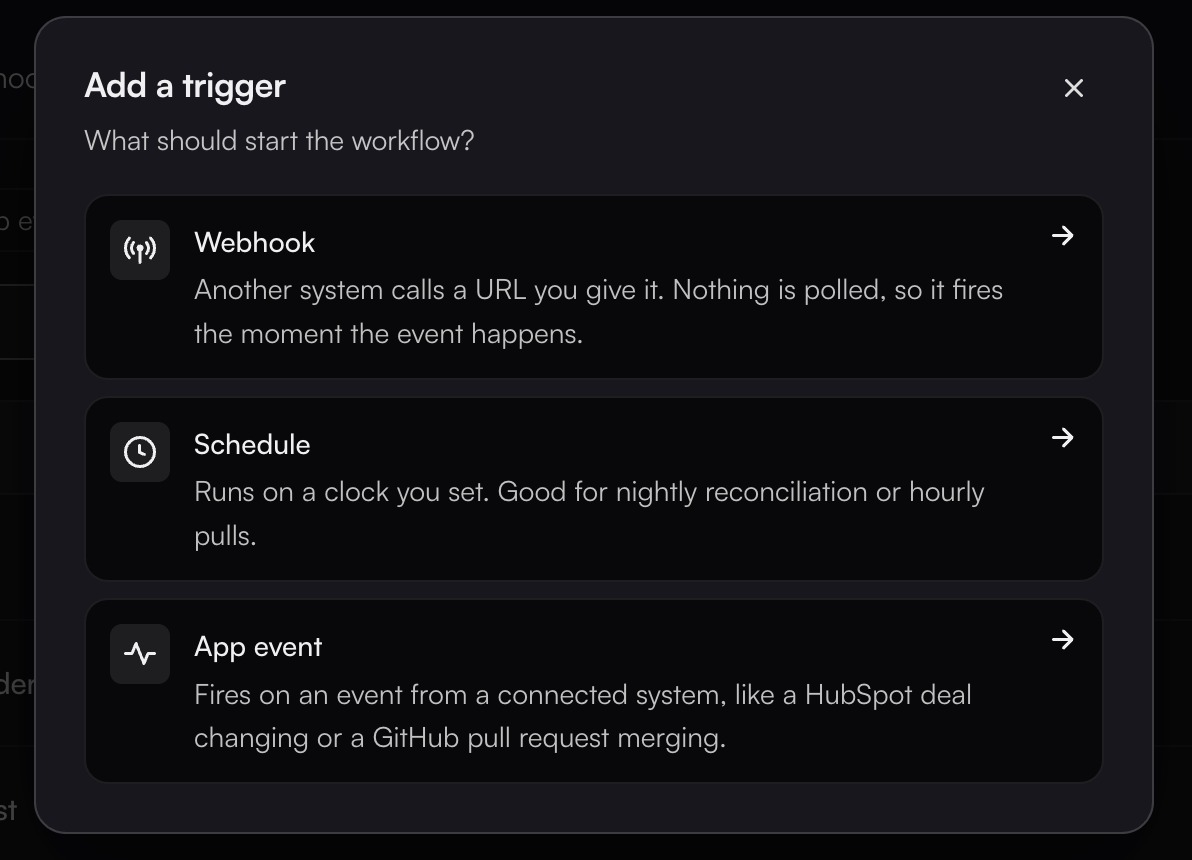
The Add a trigger dialog asking What should start the workflow?, offering Webhook, Schedule and App event as three rows, each with a sentence of explanation and a forward arrow
Each option carries its own one-line description — reproduced nowhere below, so read them here.
Type
Reach for it when

Webhook

The sender can push, and you want it immediate.

Schedule

Nightly reconciliation, hourly pulls, anything time-based.

App event

A HubSpot deal moves, a GitHub PR merges — and the connector supports events.

Inspecting a trigger

Clicking any row opens a side panel, which is where most of a trigger's life is visible. It carries Details, Retry policy and Status history, and its footer holds Close, Trigger Now and Edit.

The panel — not the row menu — is where you read why a trigger is in the state it is. Status history is the only place a change of status is explained, and on a schedule trigger it is also where Consecutive Failures and the Re-enable Cooldown appear.

Managing triggers

The status select separates active from disabled. Disabling a trigger stops it firing without losing its configuration — the right move while you fix a workflow, and better than deleting it.

When fastn disables a trigger for you

Disabling is not only something you do. A schedule trigger that keeps failing is disabled by the platform, which is why the Schedulers list has a Failures column at all — it counts consecutive failures, and it resets when a run succeeds.

When the platform disables one, three things are true:

  • The trigger's status becomes Disabled exactly as if you had done it by hand, so the list gives you no hint about which of you did it.

  • A Re-enable Cooldown applies before it will run again — the scheduler detail panel states the interval.

  • The reason and the moment are recorded in Status history on the detail panel, which keeps the last 20 status changes and marks the automatic ones.

So if a nightly job silently stops, open the row, read Status history, and look at the Failures count — do not assume someone on your team turned it off.

In this section

Last updated

Was this helpful?